Need to see your entire network in one place? Make a network diagram. In this guide, we’ll walk you through how to create a network diagram, and whether you draw it by hand or build it with a tool like Slickplan, producing one is as easy as understanding one.
They say a picture is worth a thousand words, but if that picture can explain your entire network… it’s worth a lot more. Let’s get to work on visualizing yours.
How to create a network diagram
First, what is a network diagram? Let’s properly define it — it’s a visual representation (or schematic) of the structure of a telecommunications network depicted as nodes and connectors.
More simply, it’s an image of a computer network showing how everything is connected.
Creating a network diagram from the ground up is just as simple.
It comes down to learning shapes, symbols and equipment, as well as becoming familiar with topologies and a sprinkle of common sense.
In the following step-by-step guide, we’ll show you how to build a network diagram in the easiest and most efficient way using the online diagram tool built into Slickplan.
1. Gather equipment identification
Start by putting together a list of all the equipment and devices that’ll be part of the network.
Leaving out any components here will lead to an incomplete diagram and, ultimately, a network diagram that’s missing connections. Not good.
Common items to include are modems, routers, hubs, servers, mainframes, firewalls, printers, scanners, computers/workstations, switches, etc.
And you’ll need a way to identify those devices for this to be accurate and easy to understand. Whether it’s an IP address or a name, the information has to be unique to each device.
2. Select a network topology
Network topology is a fancy way of saying the physical arrangement of the components in your network diagram.
There are several network topologies to choose from, such as:
- Bus topology: Best for small networks, the hub topology connects all devices via one single cable. This is known as a bus, and it’s one of the least expensive and easiest setups.
Still, when problems arise, such as random shutdowns without warning, it can be time-consuming and difficult to identify the issue.
- Ring topology: As the name suggests, this is a circle and data must pass through all other devices along the way to reach its destination.
One issue here is that when one device goes offline, it affects the whole network since data can no longer pass through it.
A solution to this is bi-directional topology (meaning the data can go the other way if there’s a shutdown), but most of these networks are single-direction.
- Star topology: A star-shaped structure is created by all devices being connected to a central hub with all data passing through it to get to any other endpoint.
An advantage here is if one or more devices experience a shutdown, the remaining network can function. But if the hub goes down, however, so does the network.
- Point-to-point (P2P) topology: In this scenario, any two connected devices also have one other link in common.
- Tree topology: one of the most widely used in larger networks and easy to scale; this resembles a sitemap in some ways and has one main rule: there is only one connection between each node.
- Mesh topology: In this topology, all devices are connected to every other device, thus creating a mesh. This is most commonly found in wireless setups.


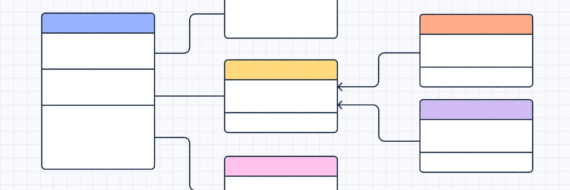
3. Add shapes
Now that you’ve made your list of devices and chosen a structure/topology, you can begin adding shapes to the diagram.
Shapes are typically simple squares, while symbols are easily identifiable illustrated versions of what they represent along with a text label.
Note: You’ll need a unique shape or symbol for all devices in the network.
4. Make connections
Next, begin to draw lines that match the topology you’ve chosen for your network. You may also use arrows if there is a directional attribute to your data flow.
5. Final adjustments
Once everything’s in place and all connections have been made, colors can be added (if needed or desired), and you can tidy up spacing and sizing so the diagram is comfortable and easy to read.
This is an excellent time to ensure any last-minute additions to device lists and connectors are addressed and resolved.
If your work needs peer review or final approval before a physical network is put together (or if you’re diagramming an existing network), now would be the time.
Et voila! Save your work, export and share.
🎬 Learn what Slickplan can do!
We filmed a short video to show you exactly how to use Slickplan
Why you should be creating network diagrams
Whether you’re drawing a network diagram on paper or using prime flowchart software, there are many reasons to invest time in doing so.
- Having a visualization of your entire network makes it easier to pinpoint trouble spots and locate areas for improvement.
If you can see it, you’ll have a better idea of how it’s working or how to diagnose a problem when it isn’t working, just like UML diagrams help developers understand system behavior in software design.
- It saves time and lowers the risk of network errors to have a file you can open and clearly see rather than relying on memory every time you need to discuss it.
- Network architecture diagrams allow for simplification. Like most things in life, simpler is better. A more complex network means it becomes more vulnerable.
- Planning network upgrades or changes is far easier and a lot more effective when there’s a visual representation of the network to discuss and collaborate on.
- A network diagram allows you to isolate a problem area, leaving the rest of the network to thrive while you clean up the mess.
Tips on how to make a network diagram work harder for you
Up next, we’ll go over some ideas on how to make network diagram projects work even better to get the most out of them.
- Learn the topologies really well.
It’s important to set up your network diagram in the most accurate fashion possible, but knowing all of the topologies is key here. Choosing the right one requires knowing all the options, and your selection could be the difference between a well-oiled machine and one that could use a major tune-up to prevent loss of speed or efficiency. Topology is absolutely one of the biggest priorities here.
- Use a network diagram template.
Templates are a great starting point for any project, particularly if you’re unsure of where to begin or which topography to use.
With equipment and devices already in place, you can easily edit names, device types and the number of components overall. Adding or removing connectors, changing connection points and customizing items to match what you have in your system.
- Never say "complete."
At some point, you’ll finish the work, share access to the image or PDF, and hopefully get plenty of use out of it, but your work should never really be complete.
As technology matures, upgrades to in-house networks will inevitably be made, and your diagram should reflect that.
There’s no need to fuss over it on the daily, but always be ready and prepared to adjust and grow.
An out-of-date diagram will do no favors, even with the most basic systems.
This is an easy way to guide your efforts and get the best end result.
Building network diagrams for image export

Now that you’ve put in the work to build network diagram setups for whatever your needs may be, it’s time to share them.
Once you’re satisfied with your diagram, move your mouse to the top right of the Slickplan window, click Export, format to your liking, select Image and choose from PNG or EPS (vector) options.
Slickplan automatically downloads a copy of the file to your computer, which can be shared to any other device or software application, internal server, website or library where file sharing is possible.
How to create a network map for PDFs

Learning how to create network diagram PDFs is just as easy as exporting as an image but with a small adjustment in the steps.
Using the same Export button at the top right of your screen (PDF is selected by default) choose a page layout and a few other options (as needed), click Export and again, the file is immediately downloaded to your device and available for use however you like.


Think visually. Improve UX with Slickplan
Build intuitive user flows, stronger customer journeys and improve information architecture.
Draw network diagrams online now!
Now that you know how to draw network diagram setups, it’s time to start visualizing yours. With Slickplan, you can easily create network diagrams online with our simple drag-and-drop interface and swiftly share them with your entire team.
Sign up for a free 14-day trial to start creating and collaborating inside our Diagram Maker, and you’ll quickly see what makes Slickplan the number 1 diagramming tool in the business!


 X
X