Picture this; in front of you is a mountain of data or brainstorming ideas that feel impossible to process, organize and act on. You know there are conclusions and insights in there, but getting them to the surface is a pain. Sound familiar? Learning how to create an affinity diagram is the solution.
It’s how you organize and distill key ideas from a sea of data.
This method of diagramming and visualizing data allows you to quickly sort through large amounts of info, making it easy for anyone to understand the main points and take action.
Here’s how to create an affinity diagram
A big goal of creating an affinity diagram is to end up with a visualization of data or ideas where commonalities and common themes are grouped together.
Follow these steps inside your flowchart software to create affinity diagrams that make brainstorming sessions more fruitful and reams of data more digestible.
1. Chose a topic
Naturally, you’re going to need a topic to get things started. This is typically the easiest part; start off with a solid topic that’s direct and simple; this is your base layer for organizing ideas and data within that topic.
2. Form a cross-functional team

Cross-functional teams are a fancy way of saying a team consisting of a sampling of each department or area of the project.
As an example, many popular companies and apps (such as Apple, Google, Netflix, Spotify and Facebook) use cross-functional teams. These teams bring together ideas from different points of view from all across the board to provide a better end-user experience in a product.
As with these diagrams, if everybody understands their tasks and how to collaborate, you can feel confident you’ll have a fully developed diagram that covers all bases and viewpoints.
3. Make a list of steps, facts or ideas
Everybody should be coming up with ideas, steps and facts now. These can be written on a list using pencil and paper or in an app if you create diagrams online.
Start with the original concept or idea, and go down the line. Add in ideas. Try to keep them grouped together, as this will make it easier to put them in order later.
4. Sort into categories
Those grouped ideas from above can now start to be put into categories.
You should begin to have an idea of the structure of this diagram based on these categories and sections.
This can be done by taking those listed steps, thoughts, or ideas and putting them in circles you’ve drawn or placed in an app. Anything to signify categories and grouping.
5. Design the action plan
The last step in designing an affinity diagram is putting things into a structure. The ideas are in groups which you can now generate sections of a diagram from.
The relationships between the main category or group heading and the ideas that fall under it should flow from one to another in the order in which the ideas naturally flow. Remember that these diagrams always go from top to bottom or left to right.
This step requires help from those that are most familiar with building these diagrams to make sure they flow and everything goes in the right direction in terms of the topic of the diagram, as well as diagramming rules.
🎬 Learn what Slickplan can do!
We filmed a short video to show you exactly how to use Slickplan
Why you should be creating affinity diagrams
When you design an affinity diagram using the process outlined above allows for brainstorming and collaboration where group ideas can be worked out and developed further in a way that creates clarity and identifiable next steps.
They allow you to identify patterns, visually process large amounts of ideas and data, they encourage innovative communication and deeper thought, it’s used to collaboratively identify the best solution when there’s a lot on the table, and they’re incredibly easy to make. Perfect for processes like concept development, user research analysis or feature evaluation.
Drawing an affinity diagram on paper works fine, but for easy collaboration and built-in communication, using our Diagram Maker is the way to go.
Tips on how to make an affinity diagram work harder for you in Slickplan
Next, let’s go over how to make affinity diagram tools even more effective.
- Avoid making category decisions ahead of time. Aim for a more organic collaboration and lean into the cross-functional aspects of the team. Making too many choices beforehand puts the horse before the cart.
- Everyone needs to start with the same purpose and intent. This is something that should be determined ahead of time, and everything else can follow (i.e., that organic discussion).
- Choose a moderator to take charge of the process. Nobody should be completely taking over but having someone.
- Affinity diagrams are great for teams with tons of data who also are looking to think outside the box and expand on existing ideas. They’re useful alongside other tools like UML diagrams when trying to organize both abstract ideas and technical structures.
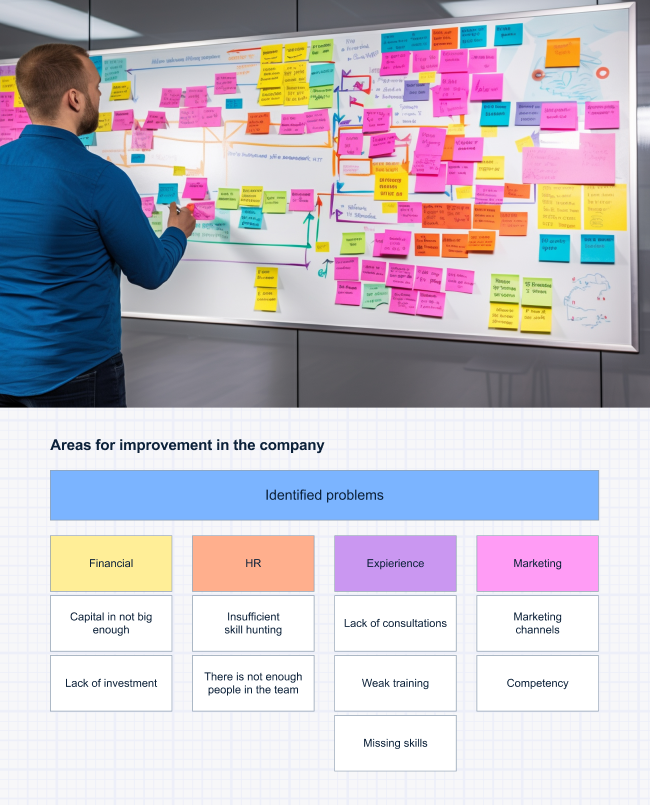
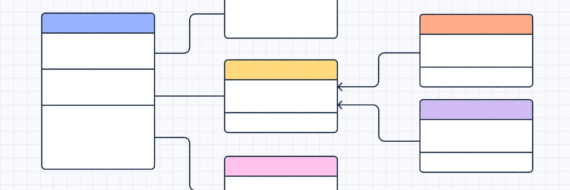
Using Slickplan’s Diagram Maker tool for affinity diagrams allows for a cleaner workspace to collaborate with rather than traditional sticky notes on a whiteboard.
If you are on a plan that includes the Diagram Maker, your plan includes all of the other features and tools we offer. Team members can access your affinity diagrams in a collaborative effort that suits several goals you may have in mind. Adding visually appealing designs to projects with sitemaps, content planning, and mockups really round out the experience and give your diagrams an added boost.
Including affinity diagrams in sitemaps and content planning takes the information, insight analysis, problem, and working session to the next level. Using an affinity diagram template can also help get the ball rolling and make an even stronger end product that can be switched up to work for you.
Build affinity diagram images for export

After completing your design, affinity diagram images can be used as a visual aid and shared with team members and other stakeholders.
Within Slickplan, simply click the Export button at the top right of the Diagram Builder, select Image, choose from PNG or EPS (vector), choose any additional options as you prefer, and finally, click Export.
An image file will be downloaded to your computer, available to be shared with whatever app or sharing channels your team uses.
How to create an affinity diagram PDF

Here’s how to create affinity diagram PDFs in Slickplan. After your diagram is complete, you can click Export in the top right corner of your Diagram Builder, PDF is chosen by default in this case. Choose from the available optional items, click Export and a PDF is immediately downloaded to your computer.


Think visually. Improve UX with Slickplan
Build intuitive user flows, stronger customer journeys and improve information architecture.
Start building affinity diagram layouts now!
Whether you’re looking to clean up messy brainstorming sessions, sort through piles of data, or make connections between concepts and ideas, you can use this lesson to learn how to draw affinity diagram setups quickly and easily.
Create affinity diagrams online today with Slickplan’s free 14-day trial and see why customers love our app. We’ve got lots of videos in our Help Desk to walk you through all of our features and tools, and if you get stuck, we’re happy to help on live chat and via email.


 X
X