Designing a website used to mean hiring developers, writing code, and months of trial and error. Today, modern platforms and drag-and-drop website builders make it accessible to anyone – you can have a new site up in hours.
The challenge now isn’t building a site; it’s knowing how to design a website that’s clear, strategic, and ready to grow. This guide walks you through everything, from defining goals to long-term maintenance.
Key takeaways
- Plan your site’s goals, structure and content before building
- Choose the right domain, platform and tools to match your needs
- Keep your site maintained and optimized for speed, security and SEO
🎬 Learn what Slickplan can do!
We filmed a short video to show you exactly how to use Slickplan
Designing a website in 13 steps
Whether it’s your own website or a site for a client, building one can feel intimidating, but with the right process, it’s manageable — even for a team of one. Follow along and you’ll end up with a website that’s user-friendly and built for success.
Website design comes with a lot of moving parts; staying organized keeps the process from becoming a mess, so it’s highly recommended to use project planning tools, a dedicated website planning tool and approaches like UX Kanban to manage evolving design work before it reaches development.
Step 1 — Define your website’s purpose and audience
Before domains or platforms, define a clear purpose for your website. Without clarity, you’ll end up with clutter that confuses users and search engines.
Questions to help find your audience and website goals:
What’s the primary goal?
- Create a website to sell products
- Showcase your work
- Generate leads
- Attract new customers
Who’s your target audience and customer base?
- Age, profession, pain points, expectations
What actions should visitors take?
- Buy
- Sign up
- Contact
- Read
👉 Learn more about mapping these visitor actions with our user flow diagrams guide.
This research is the foundation of good design — it’s also the first step in how to design a website that connects with the right audience.
Why? Because if you don’t understand who you’re building for, the layout choices, navigation, and even copy will miss the mark. A portfolio website is much different than a news blog, which is much different from an ecommerce site.
💡 Slicktip: Gather input from stakeholders or customers. A quick survey or review of analytics from existing channels (social, email, past sites) can reveal what your audience actually wants. Insights like these feed directly into your sitemap and content plan — both of which you can work on in Slickplan.
Step 2 — Choose a domain name
Once your goals are clear, it’s time to pick a custom domain that matches your brand and is easy for users to remember.Your domain is essentially your online address — it should be simple, trustworthy and consistent with your brand identity.
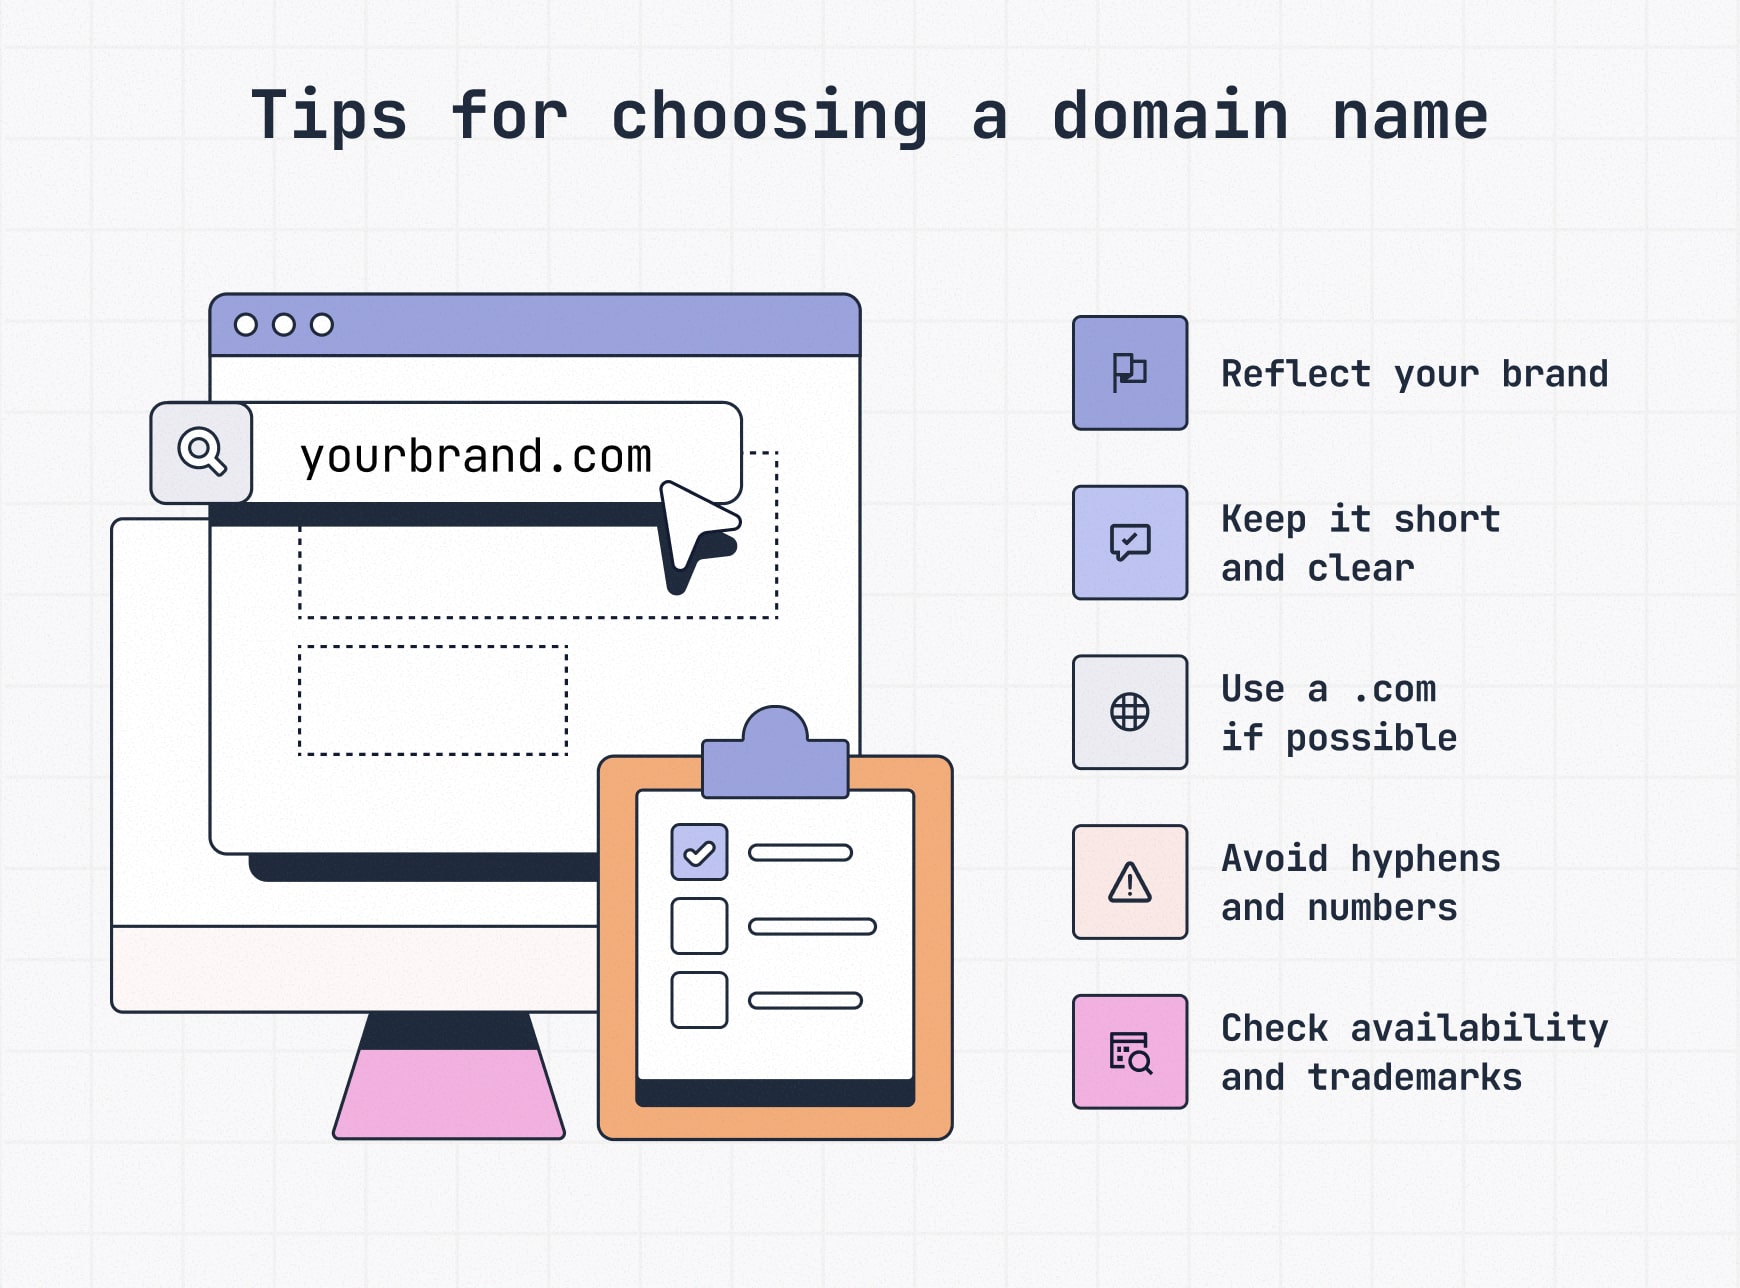
Best practices for domain names:
- Make it reflect your brand and identity
- Keep it short, clear and memorable
- allsortsofthingstobuyonline.com is tough to remember; amazon.com is easy
- Stick with a .com domain extension if possible — it’s still the most trusted
- Avoid hyphens, numbers and confusing spellings
- Use a keyword only if it feels natural, not forced
- Double-check availability, trademarks and social handles for consistency
Remember, the domain name is your site’s address; it’s meant to help people easily find their way to you.
Domain registrars like GoDaddy or Namecheap are common options, but any reputable provider works — focus on security, pricing and support rather than brand names.
Step 3 — Get a reliable hosting company
If your domain is like your address, then hosting is the plot of land where your house sits. A hosting provider stores all your site’s files and makes them available to visitors 24/7/365, like a digital landlord.
The reliability of your host directly impacts speed, security, and uptime — all of which shape user experience and SEO. A poor host can also mean downtime, slow load times and weak support; headaches that drag performance and frustrate users.
What to look for in a host:
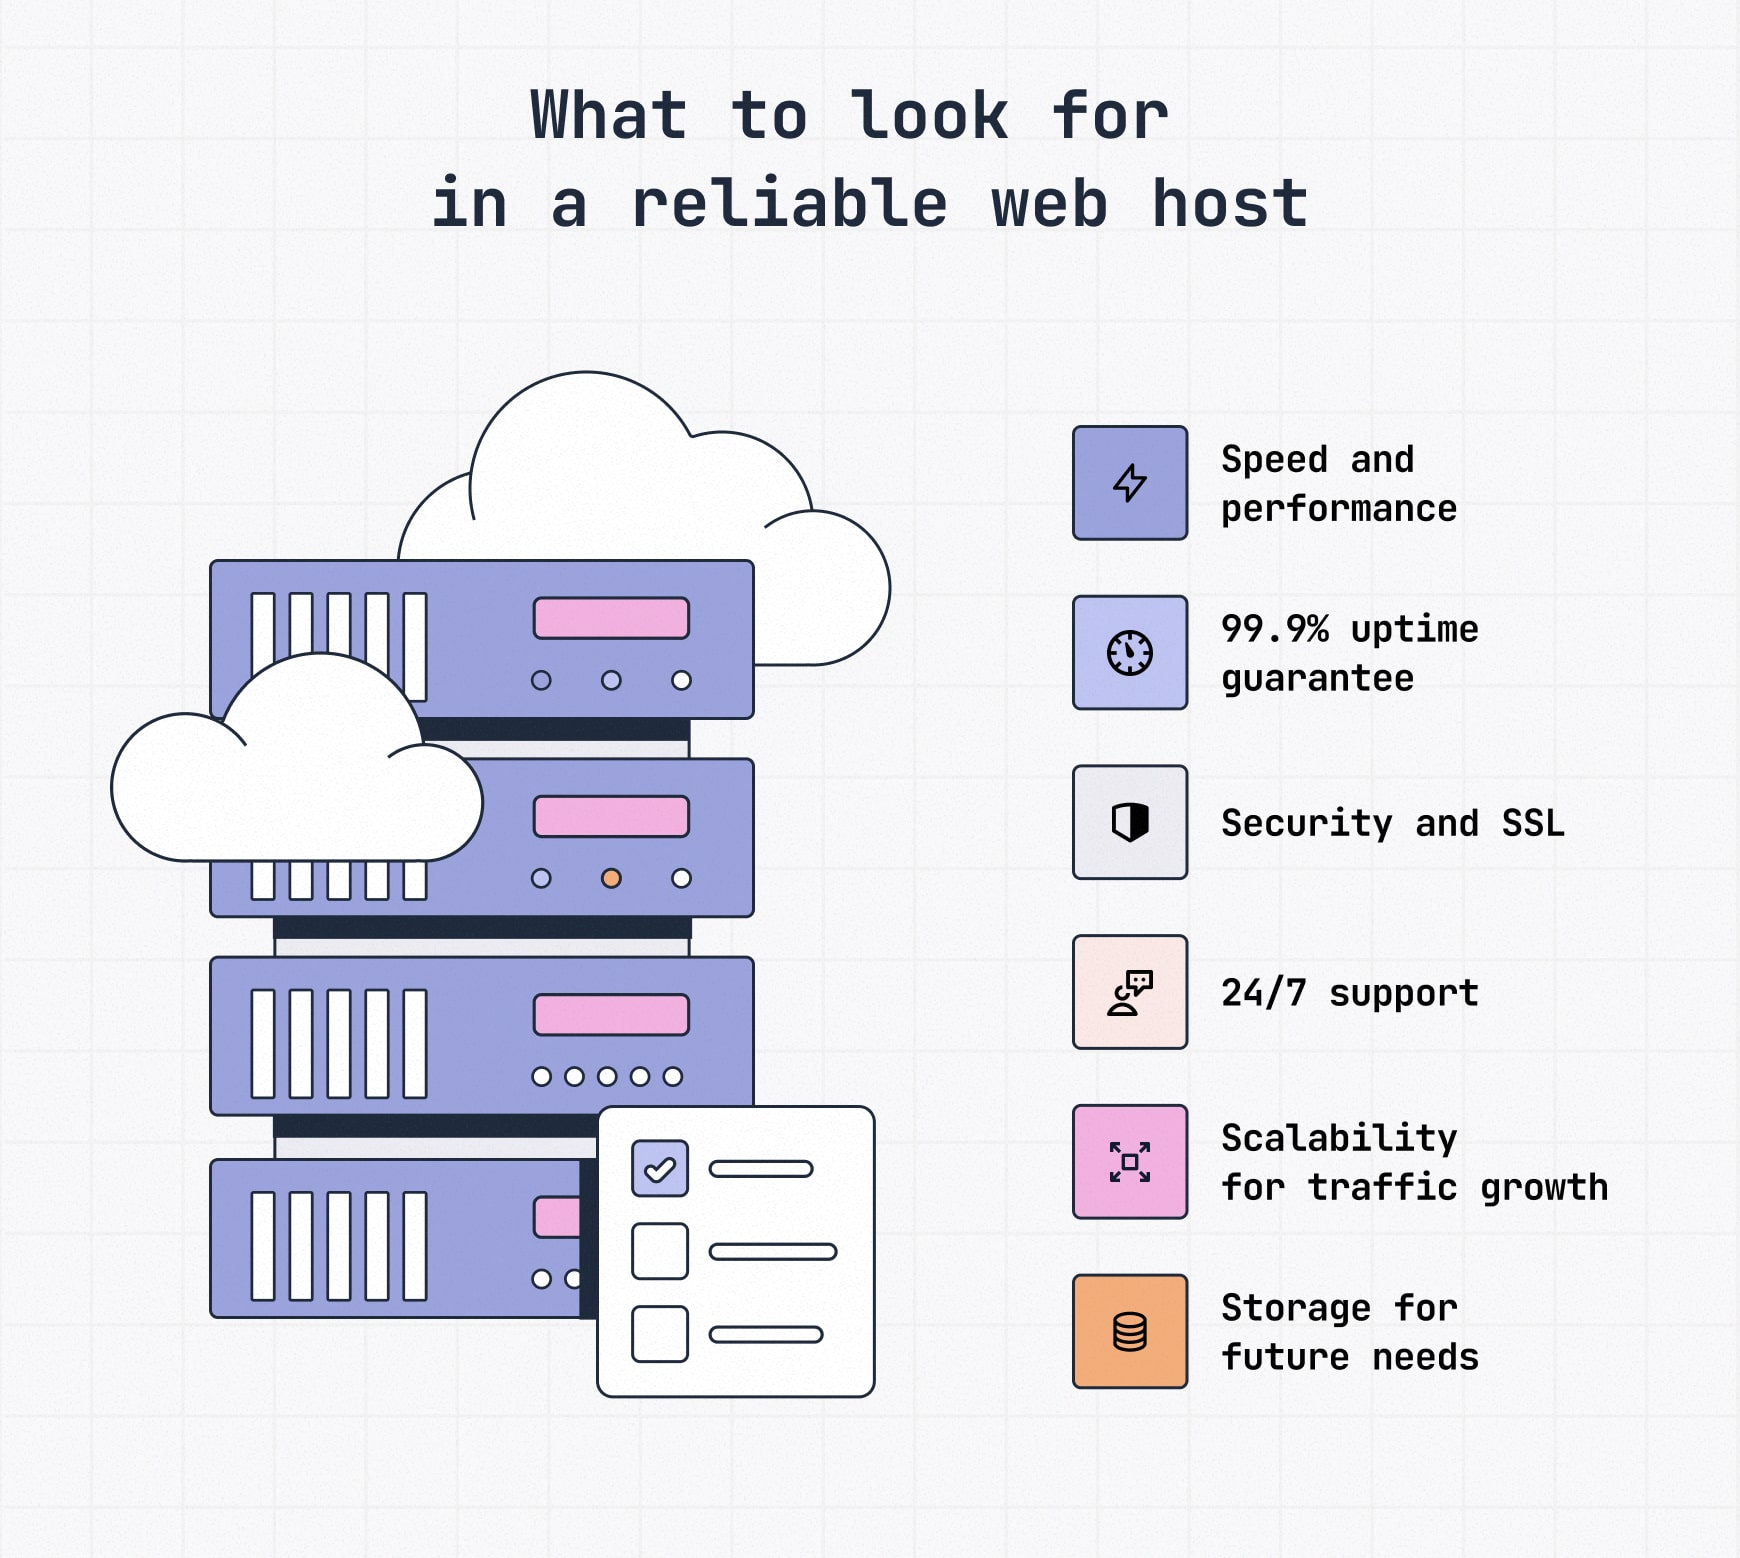
- Speed & performance: A site that loads quickly reduces bounce rates, keeps visitors engaged and improves SEO
- Uptime guarantees: Aim for 99.9% or higher; downtime = missed opportunities
- Security: SSL certificates, malware scanning and regular backups should come standard
- Scalability: Plans that grow with your traffic prevent painful migrations later
- Support: 24/7 technical help can be a lifesaver when issues arise
- Storage: Enough space for your current content and room to grow; media-heavy or ecommerce sites will need more.
Keep in mind, not all hosts are right for every type of site. Here’s what to consider in terms of types of hosting:
- Shared hosting: Cheapest, but resources are shared with many other sites. Fine for small projects, risky for growth
- VPS (Virtual Private Server): A balance of affordability and performance
- Managed WordPress hosting: Optimized for WordPress sites; usually faster and more secure
- All-in-one platforms: Services like Squarespace and Wix bundle hosting, domain and design tools into one package
Not-so-fun fact from Google: when page load time increases from 1 second to 5 seconds, the likelihood of visitors bouncing jumps to around 90%.
💡 Slicktip: Popular providers include BlueHost, GoDaddy, SiteGround, and others — but what matters most is choosing one with reliable speed, security, and support.
Step 4 – Pick a platform or website builder to design your website
Now it’s time to focus on which tool is going to help you create a site. This is the website platform you’ll use for site designing, customization and publishing aka your content management system (CMS) or site builder.
What to look for in a website builder:
- Ease of use: Is it beginner-friendly or does it require coding knowledge?
- Design flexibility: Templates, themes and customization options
- Scalability: Can it grow with your site? Check plugins, integrations, ecommerce support, etc.
- Performance: Fast load times and reliable hosting infrastructure
- SEO features: Control over metadata, headings, sitemaps and schema; check if there are built-in SEO tools
- Support and community: Documentation, customer support and active user base
- Integrated marketing tools: Built-in marketing tools like email, social and ad tools, or will you need third-party add-ons?
- Cost structure: Free vs premium plans and how pricing scales with features
Knowing what matters most to you is key to landing on the right website builder; here’s how some of the popular platforms compare:
| Platform | Best for | Key takeaway |
|---|---|---|
| WordPress.org | Businesses and advanced users | Full control and scalability; requires hosting |
| WordPress.com | Beginners who want ease | Hosting included; less flexible long-term |
| Wix | Beginners, small businesses and portfolios, quick launch | Drag-and-drop ease; limited theme flexibility |
| Squarespace | Creative professionals | Sleek templates; less extensible than WP |
| Weebly | Simple sites | Affordable; limited growth potential |
| Lovable | Fast MVPs, AI-assisted website builder | Quick starter sites; newer, less proven |
💡 Slicktip: Before choosing a platform, map out your site structure and content flow. Slickplan’s Sitemap Builder and Content Planner help you organize everything visually before you start building.
WordPress.com vs WordPress.org explained:
You might’ve noticed there are two WordPress listings in the chart above. Here’s the difference between .com and .org:
- .com = hosted for you and beginner-friendly. You trade flexibility for convenience.
- .org = complete freedom and scalability, but you’re responsible for hosting, updates and maintenance.
Although WordPress powers 43.6% of all websites , it’s not the best for everyone. Wix, Squarespace, Shopify for stores and even free website builders like Canva that come with a Canva subdomain are all great for different purposes, with plenty of website templates to get you started.
Worth noting: For professional and more complex sites, you’ll still have designers and developers working together, so make sure the platform you choose is familiar to both.
For simpler sites, small businesses and portfolios, platforms like Weebly, Wix and Squarespace make it possible to quickly get a stunning site live without developers or a team. For small businesses or personal projects, you may not need a developer at all.
We did a deep dive comparing Wix vs WordPress, so if you’re between those options, give that a look.
Step 5 — Gather and plan your content
Too many website projects treat content as an afterthought to be written and created once the design is “done”. That approach almost always causes delays and compromises the final result. It’s also where many projects quietly start to spiral — something we explore in this agency project blueprint story.
The reality: content drives design.
What to prepare before you design your website:
- Copy: Key text like headlines, product descriptions and blog topics
- Tone of voice: Define how your brand should sound (professional, playful, conversational, etc.)
- Brand assets: Logos, fonts, color palettes and visuals (images, stock photos, videos, icons)
Start with your homepage and key landing pages. Sketch out the hierarchy of messages: what needs to be said first, what supports it and where calls to action go. Slickplan’s Content Planner makes it easy to draft, organize and refine all of your site’s content collaboratively before design begins.
Content ↔ site structure: The iteration loop

Content and information architecture don’t happen in isolation. Drafting copy and gathering assets helps you see what structure is needed. Mapping structure with intentional sitemap design shows where content is missing or redundant. Expect to refine both in cycles until they align.
Jump to step 10 to get clarity and advice on designing a web page and step 11 for page-level content specifics.
Step 6 — Plan your information architecture
With your content taking shape, it’s time to start structuring it into a logical hierarchy or order. This is a website production blueprint for how pages connect and how users move through your site, often referred to as sitemap design or information architecture (IA). Think of it like an outline of site content and the basis for your navigation menus.
Why information architecture matters:
- User experience: Visitors should be able to quickly find what they need in 3 clicks or fewer
- SEO: A logical structure makes it easier for search engines to crawl, index and rank your pages
- Alignment: Teams stay on the same page when the structure is clear
- Scalability: A solid IA prevents chaos as you add new products, services or posts later
How to structure your site:
- List out your top-level pages (often Home, About, Services, Blog, Contact)
- Group related subpages, like blogs under categories
- Map the user journey to understand how a visitor moves from the landing page to taking a desired action so you can introduce information at the right time. An ecommerce user flow will look different than the flow for a news site, for example.
- Check for orphaned pages: every page should lead somewhere, not be a dead end
Common website structures:
Hierarchical structure: A tree-like model with a homepage branching into categories and subpages — the most common structure for larger businesses, ecommerce and portfolio sites.

Sequential (linear) structure: A step-by-step flow where each page leads to the next, often seen in online courses, checkouts or simple booking funnels.
Matrix (webbed) structure: A network of heavily interlinked pages without a set path, giving users freedom to navigate, common on news and large ecommerce sites.
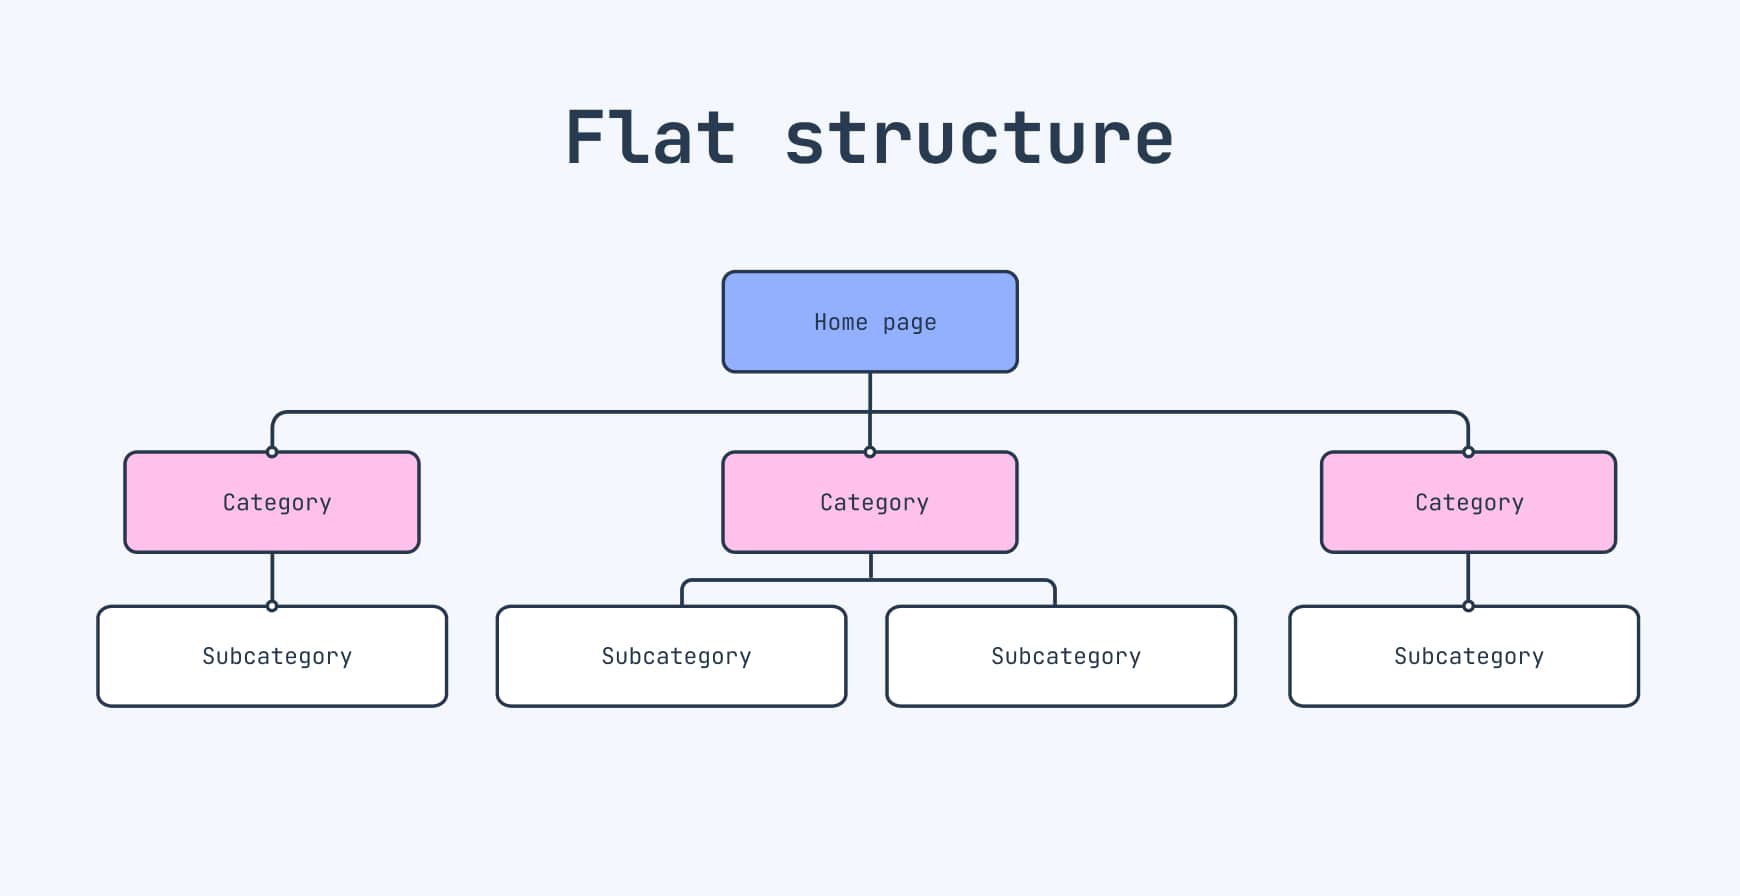
Flat structure: A shallow hierarchy with most pages linked directly from the homepage, used for small websites with limited content.
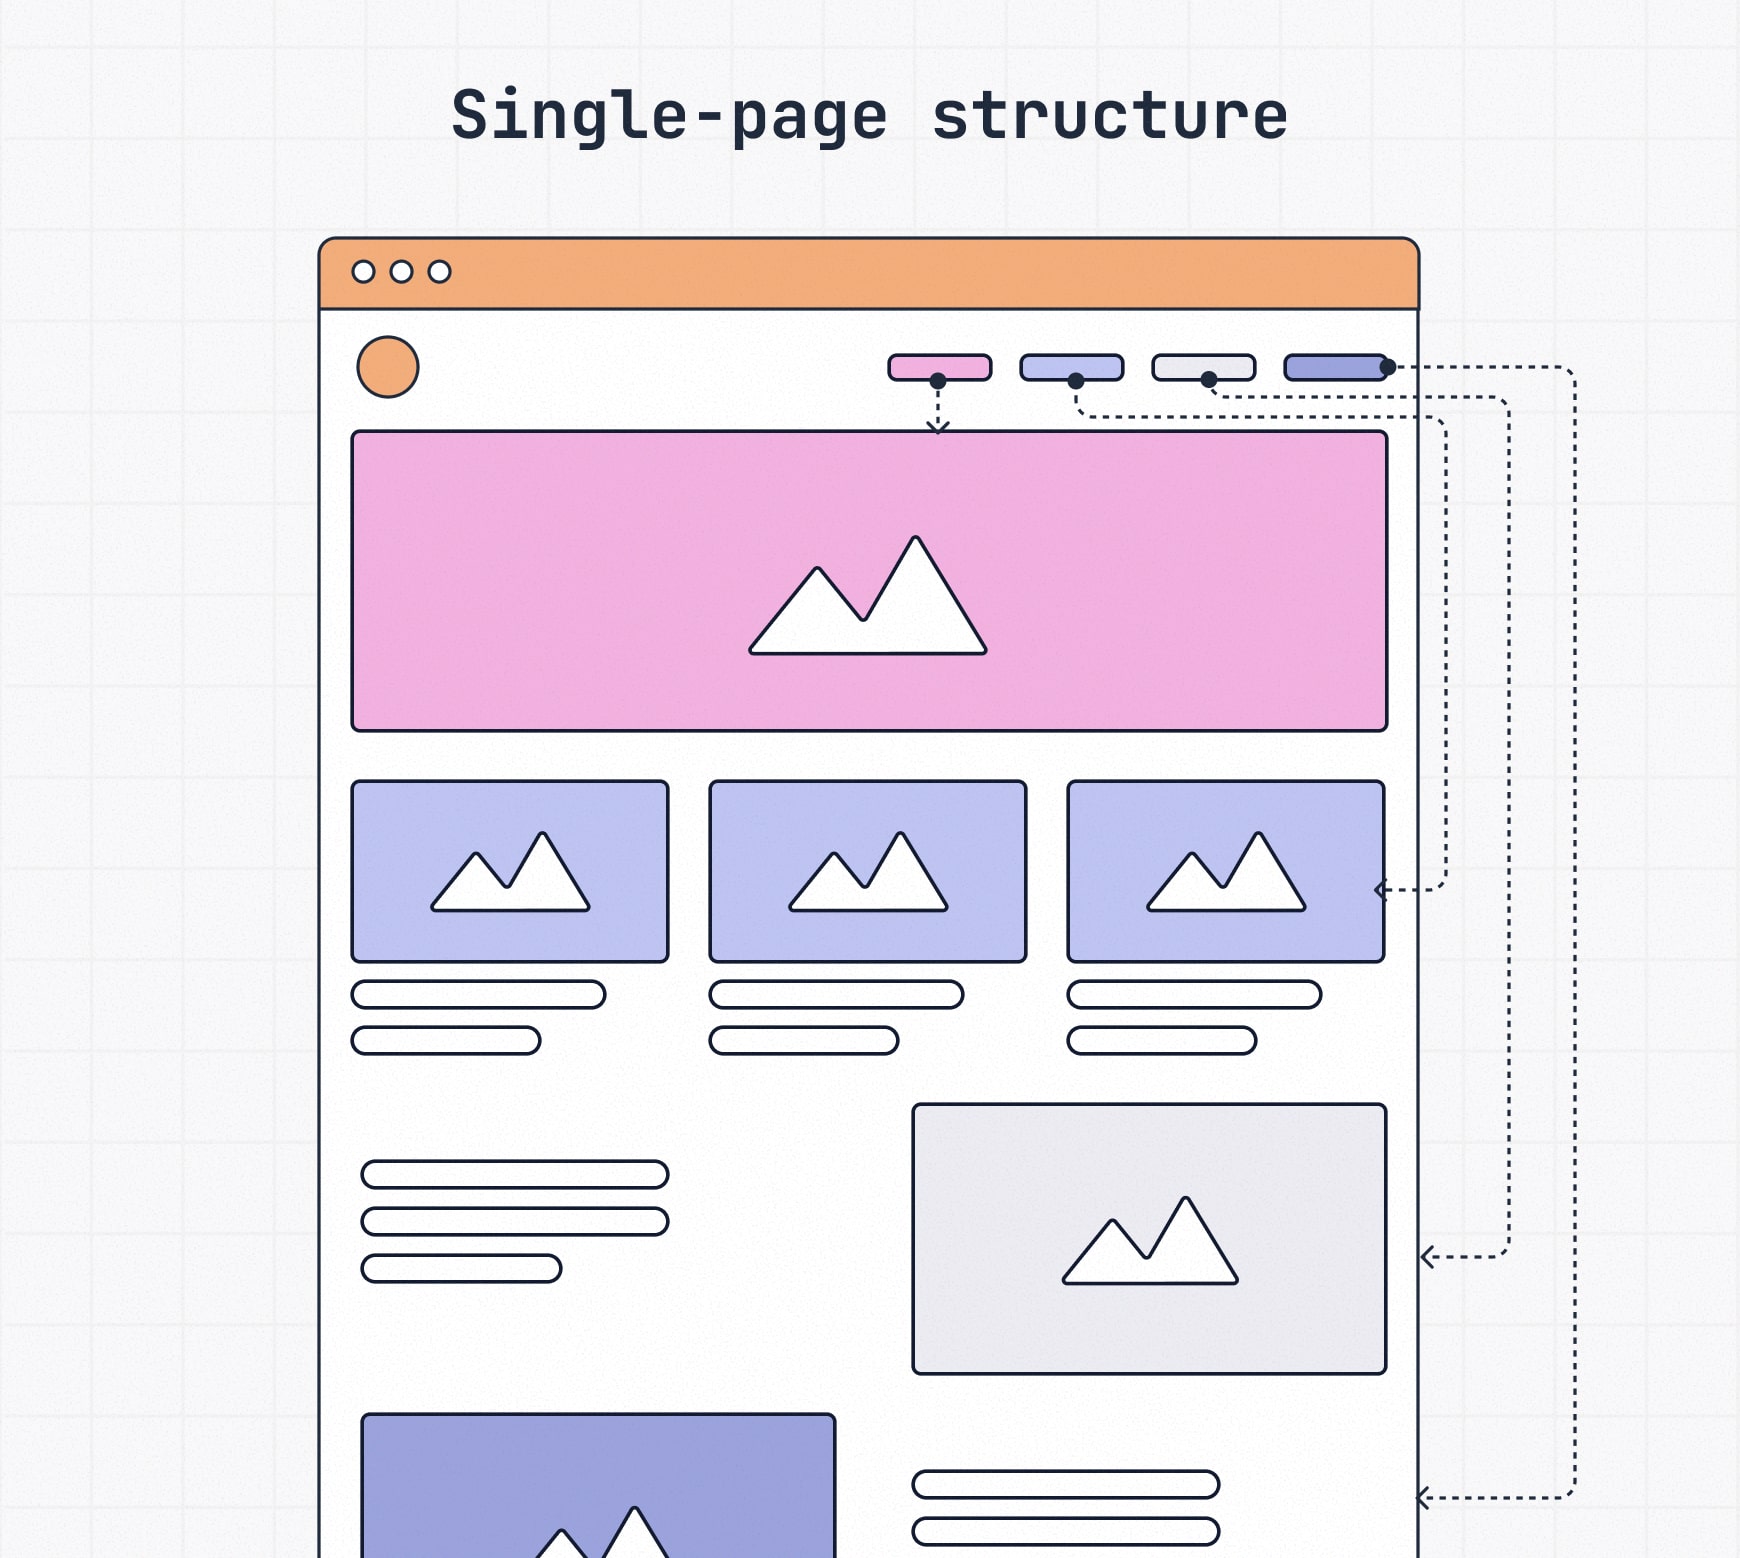
Single-page structure: All content sits on one long-scrolling page, with navigation that jumps to sections rather than loading new pages — popular for portfolios, apps or event sites.
💡 Slicktip: IA can start as simply as notes on paper, but larger or evolving sites need more. Use our Sitemap Builder to drag and drop pages, refine hierarchy, and collaborate in real time. If you spot a site you love, our visual sitemap generator can extract its structure to use as inspiration.
Step 7 — Install essential plugins and tools
Plugins are small pieces of software that extend what your website can do without requiring extensive web development know-how. It’s like adding apps to your phone; sure, your phone works without them, but the experience and functionality improve massively with them.
Why plugins matter:
- Save time by adding features instantly
- Keep your site flexible as your needs evolve
- Strengthen security, SEO and user experience with minimal setup
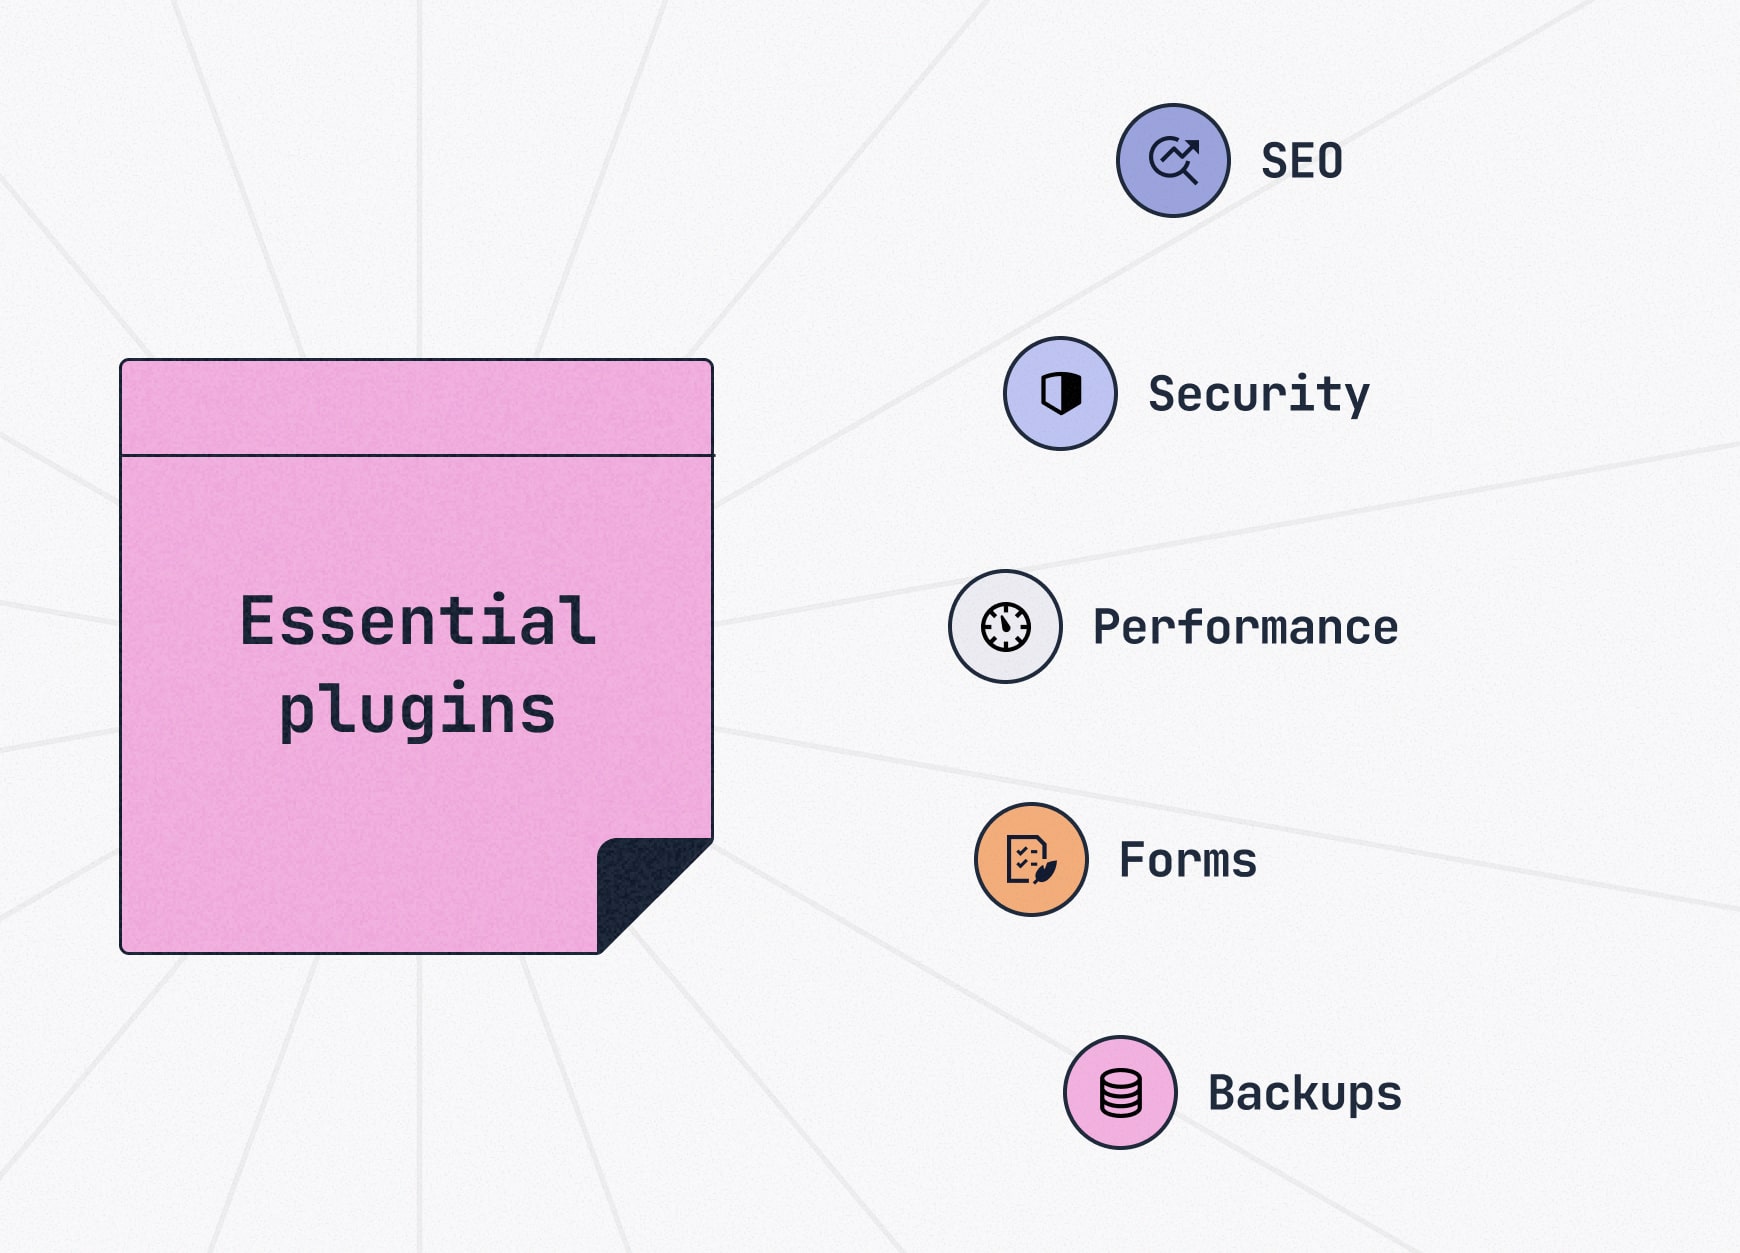
Must-have plugin categories:
- SEO: Plugins that optimize titles, metadata and XML sitemaps (e.g., Yoast SEO, Rank Math)
- Security: Tools to guard against malware and brute-force attacks (e.g., Wordfence, Sucuri)
- Performance: Caching plugins that improve load times (e.g., WP Rocket, W3 Total Cache)
- Forms: Contact form builders to capture leads or feedback (e.g., Contact Form 7, Gravity Forms)
- Backup: Plugins that provide automated backups and easy site restore (e.g., UpdraftPlus, Duplicator)
Step 8 — Create a website layout
Wondering how to design a website layout? Start by thinking of it like a floor plan: you’re deciding room sizes and flow before deciding on the paint. For a website that means locking in navigation, content blocks, calls to action, footers, etc. Creating a layout first ensures your design fits the content — not the other way around.
Layout defines what goes where and how users move through a page.
Tools for layout:
- Digital: Figma, Sketch, Adobe XD
- Analog: pen and paper sketches work just as well for early drafts
Why designing a web page layout comes before theme selection:
- A clear layout prevents content from being forced into a template that doesn’t fit
- It’s easier to select a theme once you know your content hierarchy and flow
- Rapid prototyping tools help you test ideas quickly and spot issues before building
💡 Slicktip: Link your layout back to your sitemap. If the sitemap is the blueprint of your entire site, the layout is how each room (page) is arranged to guide visitors naturally toward their goals.
Customer insight:
We use Slickplan for every site we build; they’re all on WordPress and we use the Slickplan importer plugin
Website page layout examples
Page layout planning works in tandem with your sitemap planning. The sitemap defines what pages exist and how they connect, while the layout shows how content is arranged within each page.
Here is an example of a page layout and the accompanying Slickplan sitemaps from real customers to give you a feel for how plans become reality.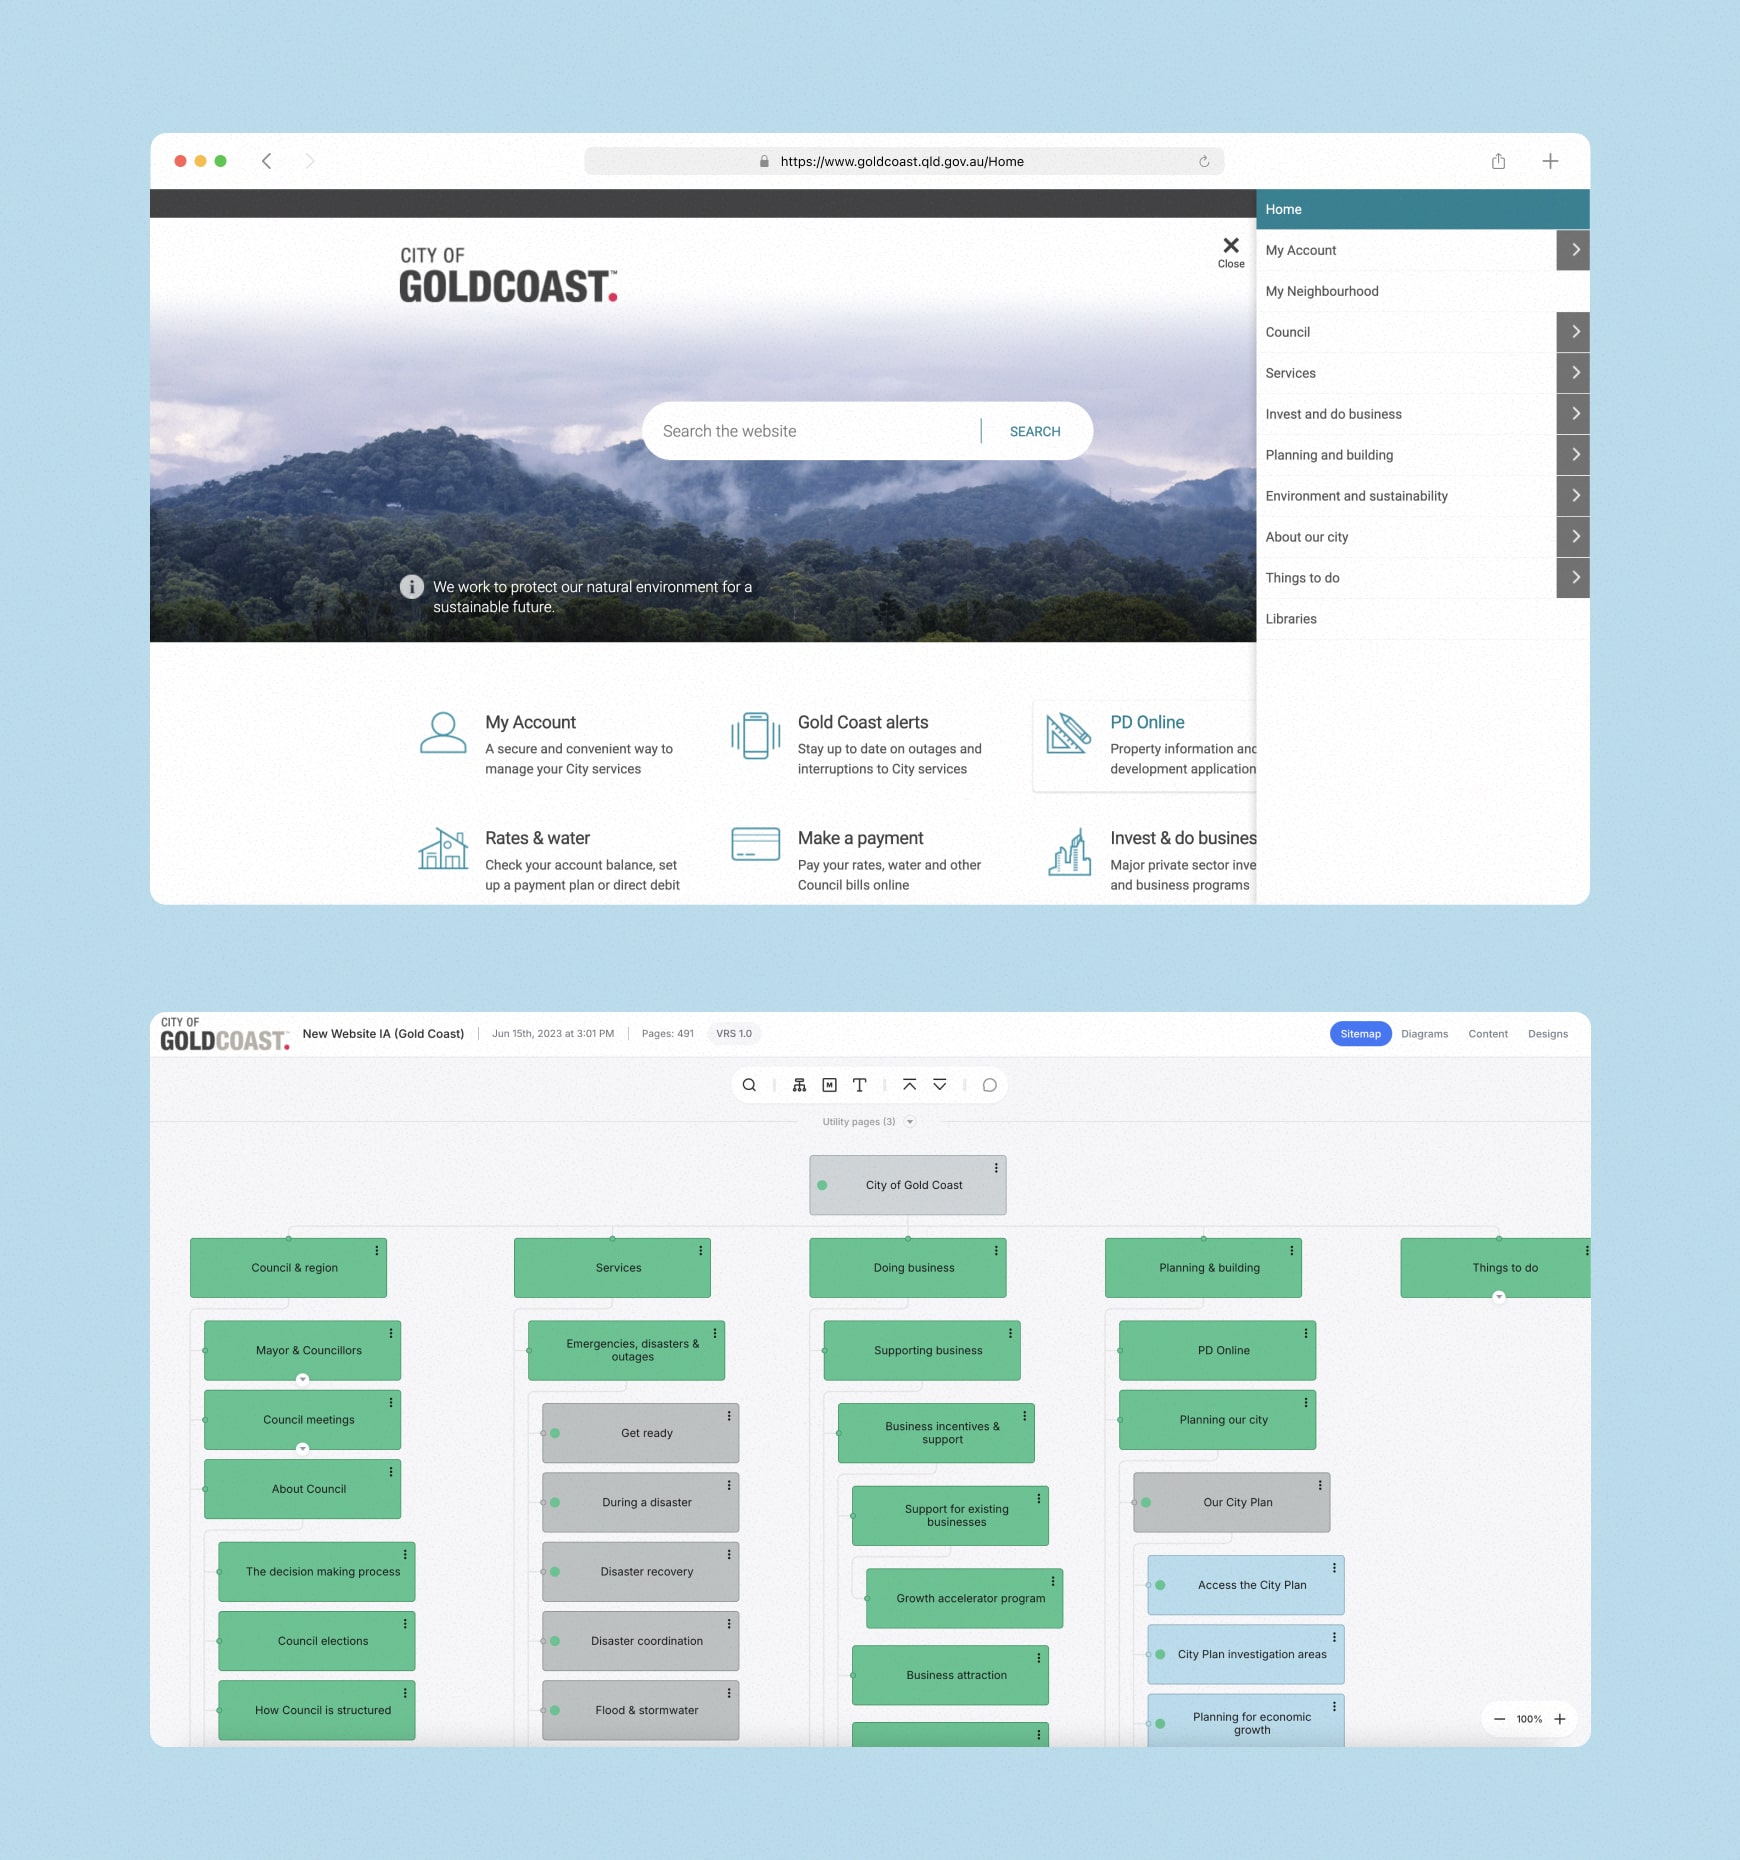
Step 9 — Select a theme that fits your brand
If layout is your floor plan, the theme is the décor that brings the rooms to life; the visual design that controls fonts, colors and default styling.
All the top website builders will include a selection of themes, some more than others, with WordPress having 13000+, for example.
How themes make a difference: Define the look and feel without starting from scratch
- Provide consistency across pages
- Save time with pre-built styles that can be customized to match your brand
Free vs premium themes:
- Free themes: Fine for personal projects or testing, but limited in flexibility and support
- Premium themes: Paid options with more customization, regular updates and reliable support — better for business sites
Choosing the right theme:
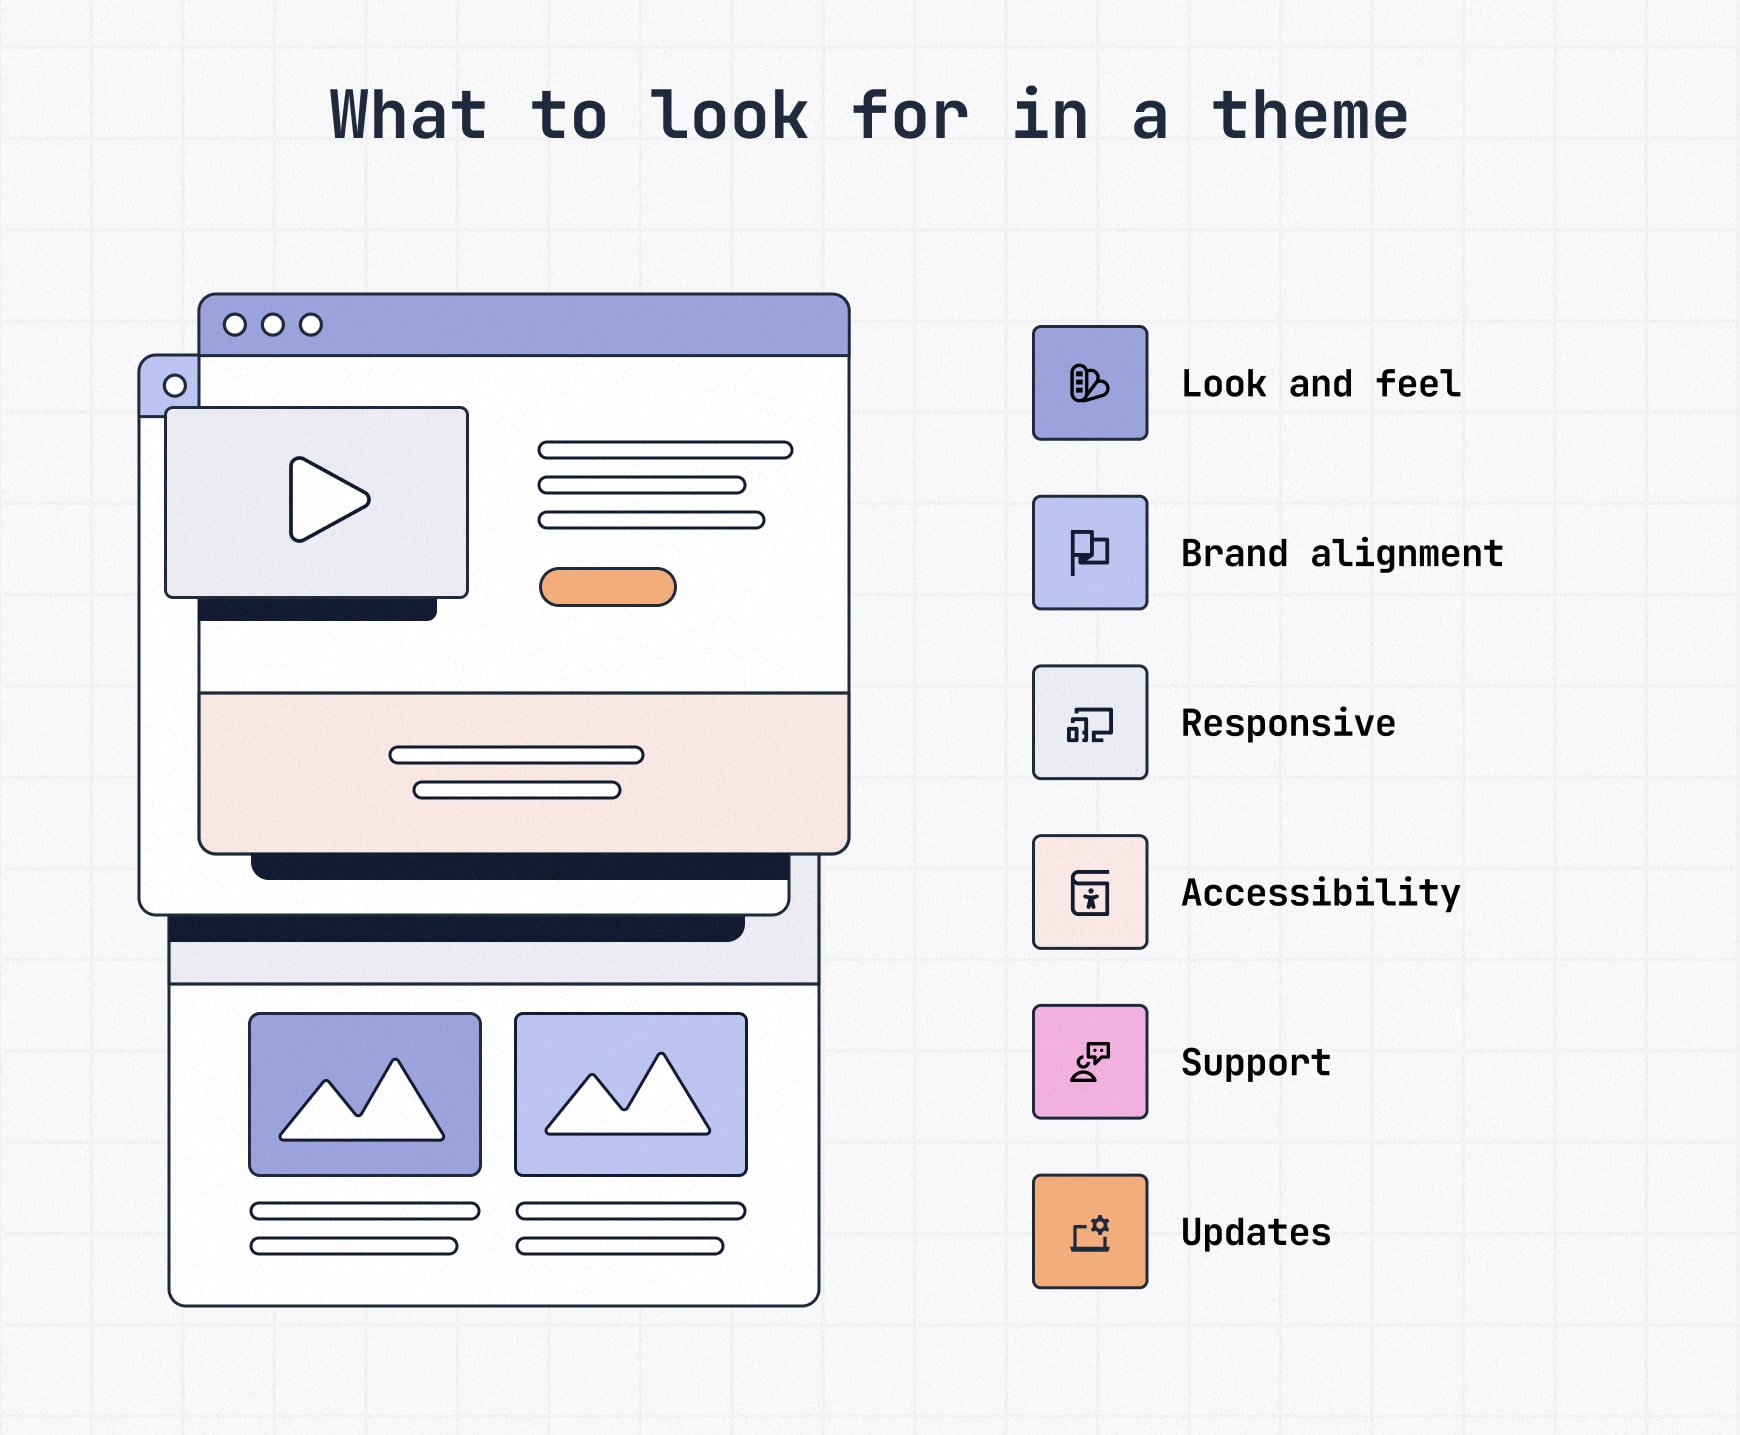
Consider the following when on the hunt for a theme.
- Brand alignment: Match your brand’s personality
- Performance: Lightweight code for speed (avoid bloated “all-in-one” themes).
- Responsiveness: Mobile-friendly out of the box (because 64% of internet traffic comes from mobile devices)
- Accessibility: Meets WCAG standards (contrast, keyboard navigation, ARIA labels) so your site works for all users
- Support and updates: Actively maintained and updated with a solid reputation
Step 10 — Learn the way around your page builder
If you’re not a developer, a page builder makes designing pages faster and more visual. Builders let you drag and drop content blocks (text, images, buttons, forms, etc.) instead of working directly with code.
When to use one:
- You want flexibility in designing a web page but without coding
- You need to launch quickly with a professional look
- You prefer visual editing over back-end tweaking
Popular page builder options:
- Elementor, Divi, Beaver Builder: premium plugins with advanced customization
- Gutenberg (WordPress): built into WordPress 5.0+, free, simple block editing for beginners
- Content Planner: Slickplan’s block editor for collaboratively drafting, editing and approving content that’s export-ready for your CMS — no extra formatting required

Keep in mind:
- Page builders add convenience but can also bloat code and slow performance if overused.
- Test site speed — a slow-loading site can drag down SEO
- Start with Gutenberg; upgrade to a premium builder only if you outgrow it
- If you don’t use a tool like Slickplan, you’ll have hours of extra work migrating every piece of content you build — that means every blog page — into your CMS for publication
Step 11 — Add pages and optimize for SEO
Once your structure and design are in place, it’s time to build out the actual pages — this is the stage of designing a web page where your content, imagery, and navigation come together.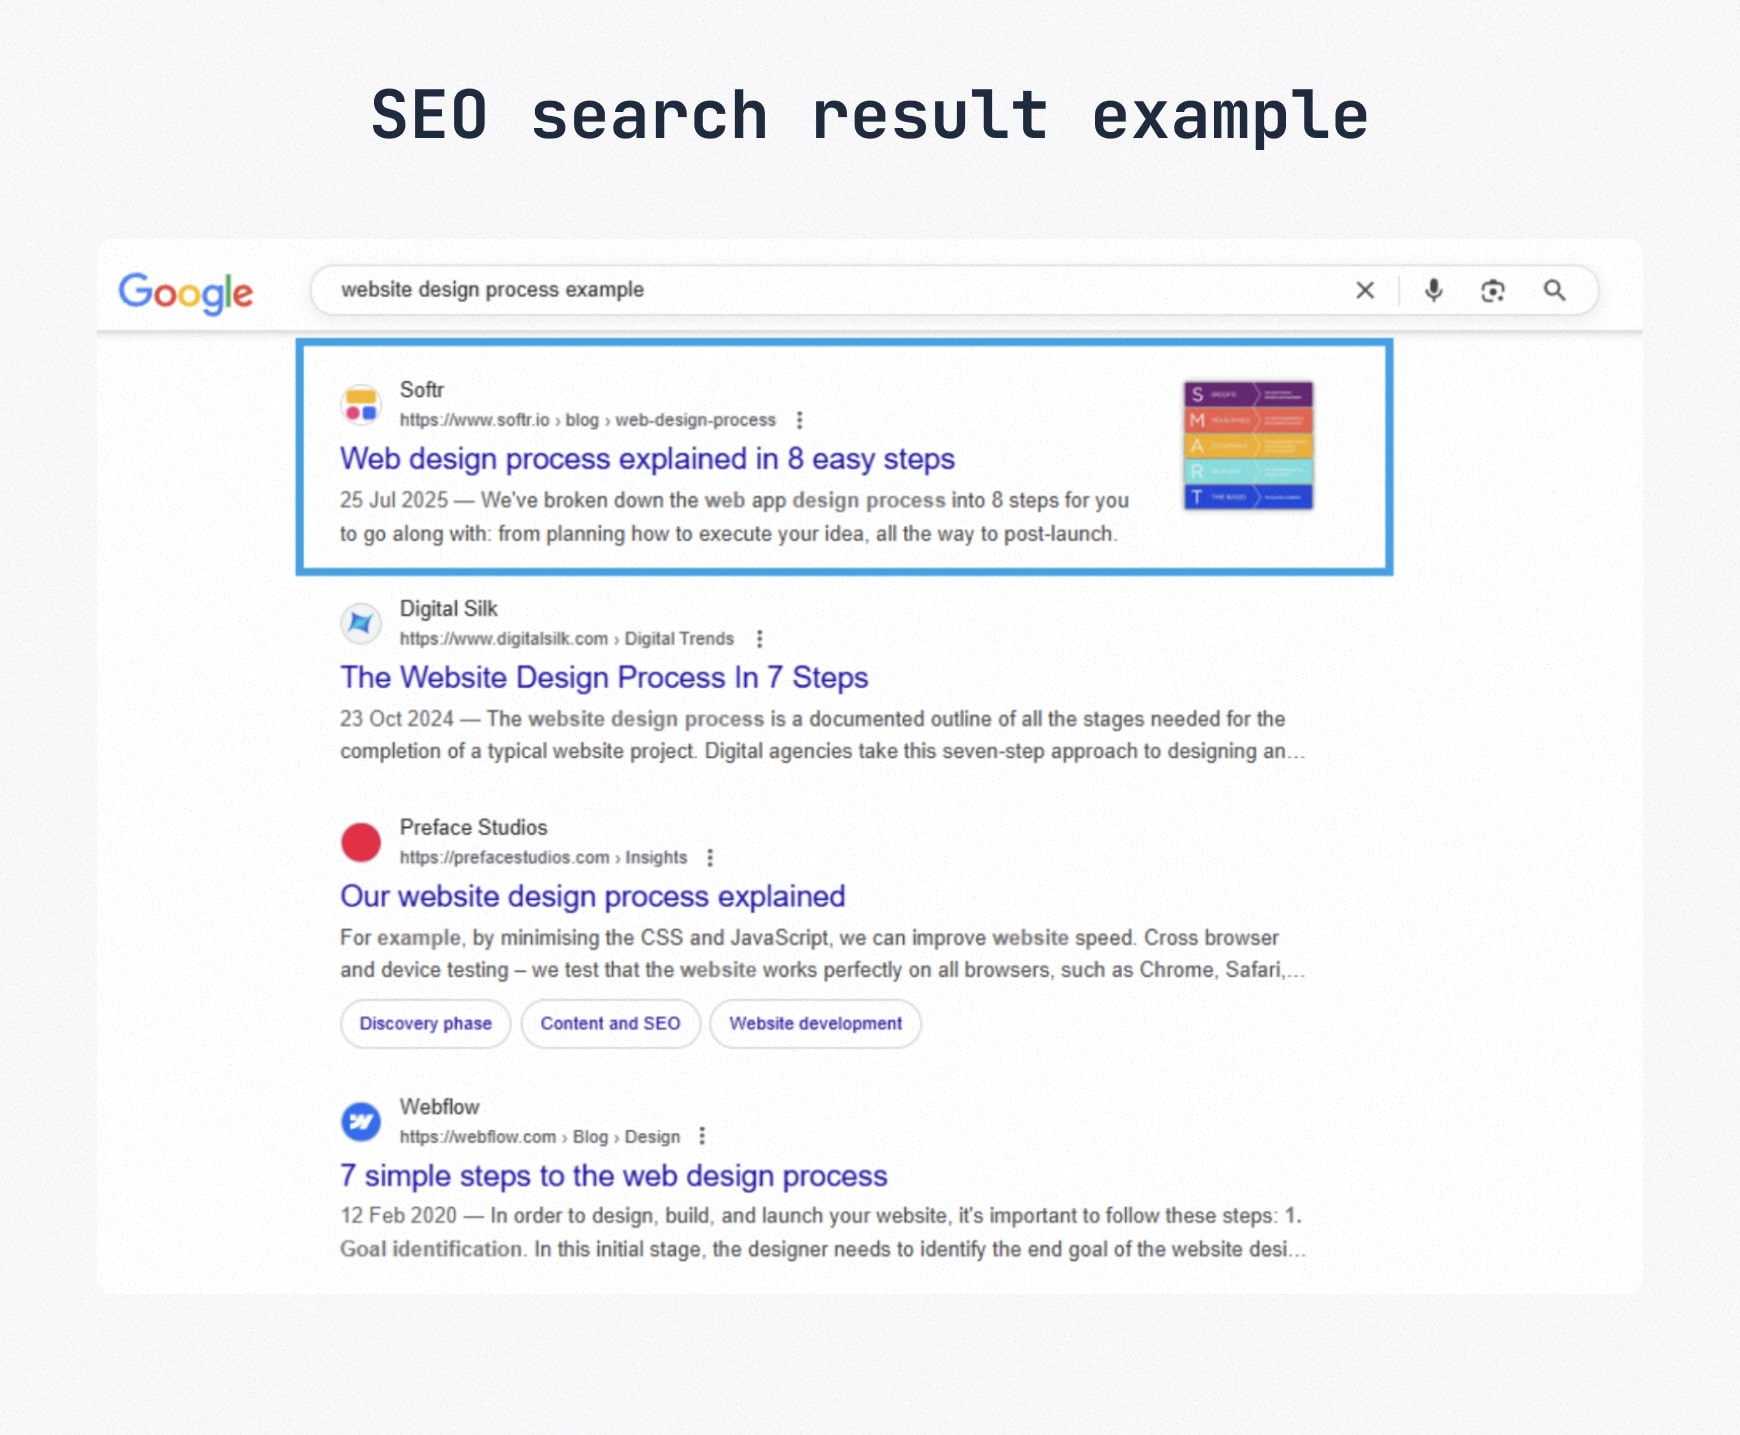
Must-have pages for (most) sites:
- Homepage: Your first impression, so make sure to invest time here. Clearly state who you are, what you offer, and the next step for visitors
- About page: Builds trust by showing the people and story behind the business
- Services or Products: Explain what you provide. Break out subpages if you offer multiple services or product categories for an online store
- Contact page: Make it easy to get in touch (forms, phone, map, email)
- Blog or Resources: Useful for sharing expertise and improving SEO
- Legal pages: Privacy policy, terms or disclaimers if relevant
💡 Slicktip: Keep navigation simple. If users need more than 2–3 clicks to find core information, revisit your information architecture.
SEO essentials at this stage
Building pages isn’t just about what users see; it’s also about how search engines understand your site. Good content and on-page SEO help generate organic traffic.
Checklist for page-level SEO:
Titles and meta descriptions: Unique and keyword-rich for every page
Headings (H1–H3): Use them logically to break up content and highlight key terms
URLs: Keep them short, descriptive and consistent with your IA
Internal linking: Point users and crawlers toward related content across your site
Schema markup: Add structured data to help search engines better interpret your content
Images: Optimize file sizes and add descriptive alt text with keywords where natural
There’s more to creating SEO-friendly content than just the technical stuff. Check out our SEO content guidelines for deeper insights
💡 Slicktip: Think of SEO as part of UX. Search engines like Google reward sites that are easy to navigate, fast, and, most importantly, relevant to user queries.
Step 12 — Test and launch your website
Before you go live, it’s critical to put your site through testing. Last thing you want is to go live only to discover a laundry list of issues after. Issues that could frustrate users, lead to high bounce rates and lost sales/conversations.
Getting feedback before launch is far less painful than making fixes on a live site.
And if your website project is on a larger scale, share your staging site with stakeholders early.
Here’s a quick pre-launch checklist to keep your site polished and ready before you go live:
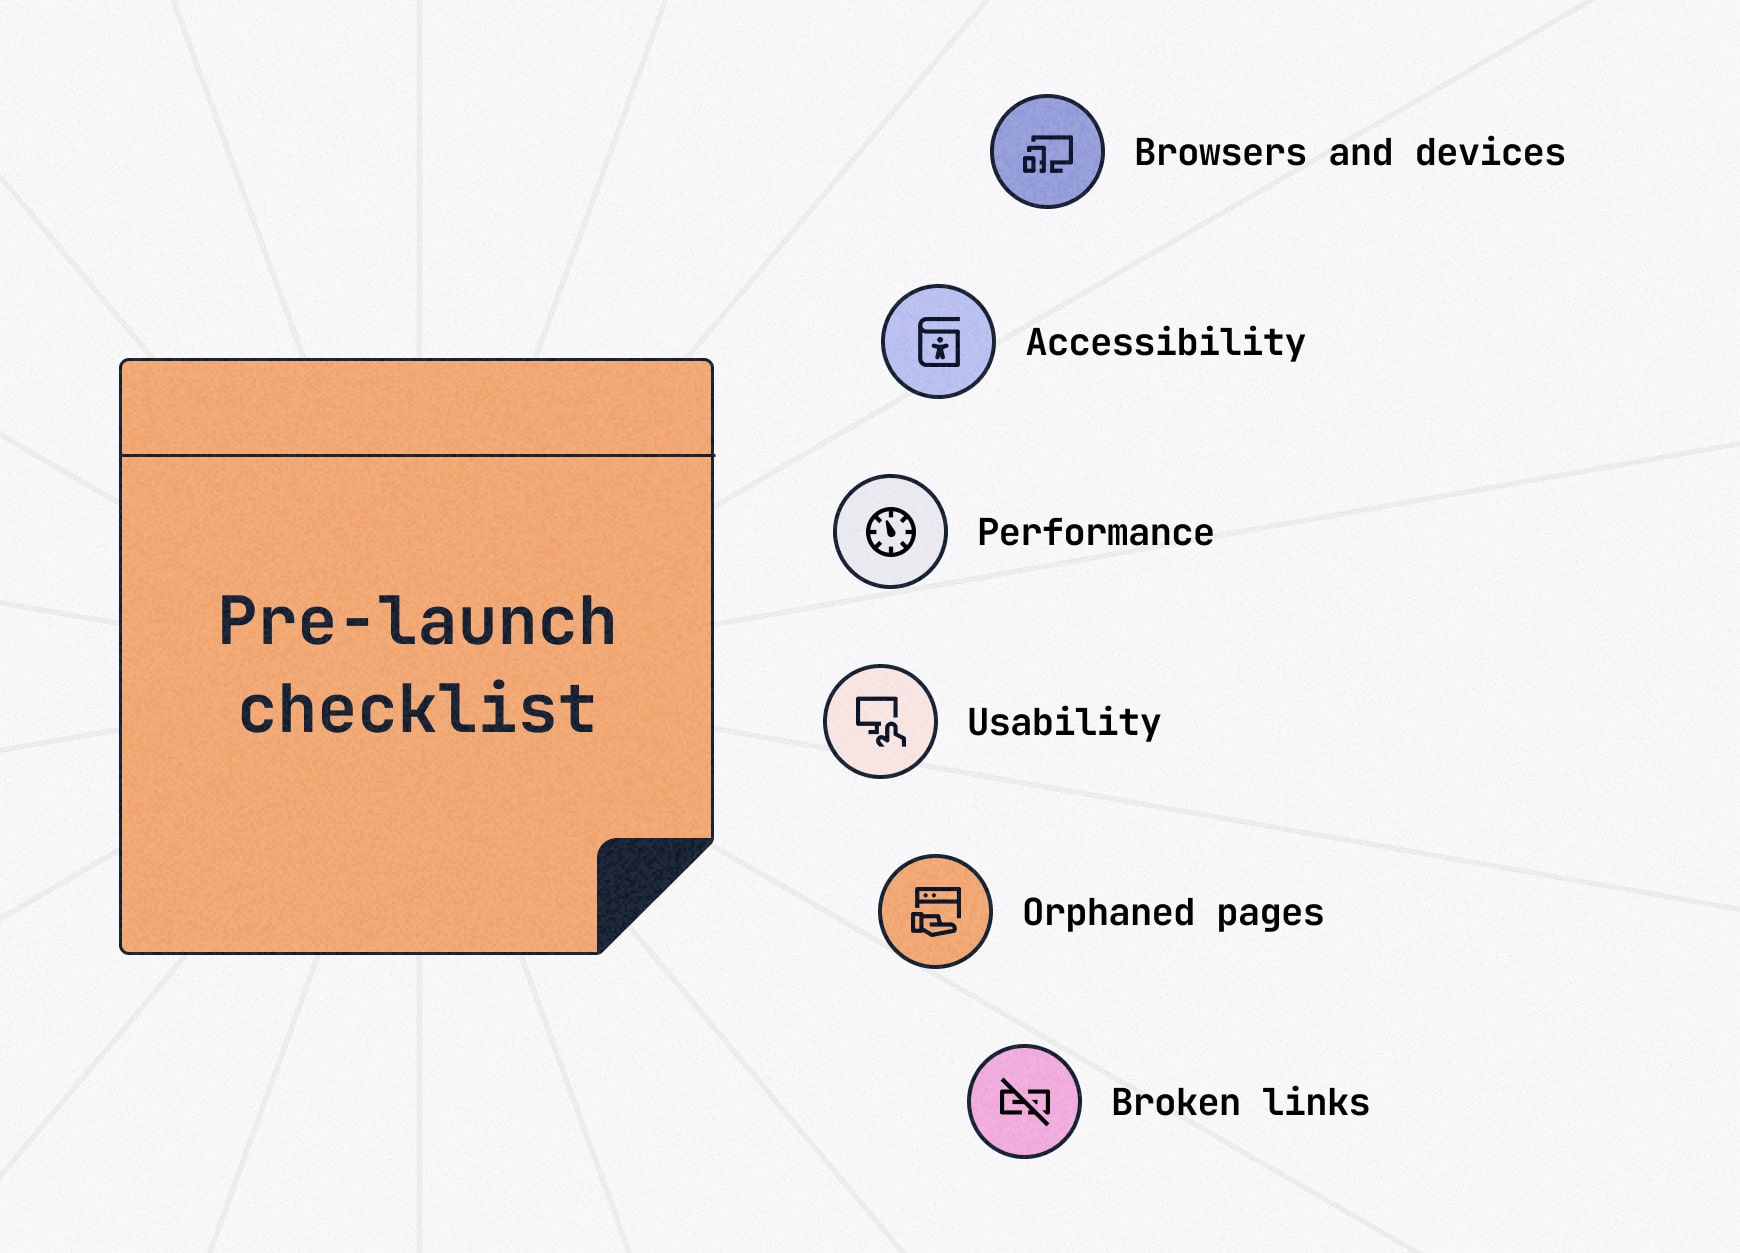
- Cross-browser and device check: Make sure pages render properly in Chrome, Safari, Firefox, Edge and on tablet/mobile devices.
- Accessibility: Test color contrast, keyboard navigation and alt text for images
- Performance: Run a speed test (tools like Google PageSpeed Insights and GTmetrix are solid) and fix bottlenecks like oversized images that slow loading time
- Usability: Click through as a user would and check forms, buttons, menus and CTAs
- Orphaned pages: Make sure none of your pages are dead ends
- Broken links: Scan for 404s and redirect anything that’s moved
Launch checklist:
- Enable SSL for a secure HTTPS connection
- Submit your XML sitemap to Google Search Console and Bing Webmaster Tools
- Set up analytics and tracking tools (Google Analytics is always a good option)
Step 13 — Maintain and monitor your website
Launching your site isn’t the finish line; it’s the start of an ongoing process. Regular maintenance keeps your site secure, fast, and relevant. Ongoing monitoring is critical because it allows you to catch problems — like broken links, downtime, or outdated content — before your visitors do.
Core maintenance tasks:
- Updates: Keep CMS, themes and plugins up to date to avoid security risks
- Backups: Schedule automated backups (daily or weekly, depending on website size)
- Security checks: Scan for malware, expired SSL or suspicious activity
- Content refreshes: Update content, add new blog posts, retire old pages, etc.
Monitoring essentials:
- Analytics: Use Google Analytics, Semrush or similar to track traffic, conversions and user behavior
- Performance: Run periodic speed tests and fix bottlenecks that come up
- SEO health: Monitor rankings, crawl errors, 404 errors, and broken links in Google Search Console
- User feedback: Collect input from real visitors to guide future improvements
Put your website plans into action
Designing a website isn’t about looks alone, it’s about structure, clarity and meeting visitor expectations. Nowadays, you can build a stunning, fast-loading site with zero coding experience, one that delights users, creates conversions and grows your business.
Well-designed websites aren’t an accident; they’re planned.
Start planning yours today with a free 14-day Slickplan trial.


Share & refine designs with Slickplan
Add mockups from Figma or your computer to ensure UX/UI is moving in the right direction.
Frequently asked questions
Can a beginner design a website?
Yes. Modern platforms like Wix, Squarespace and WordPress.com make it possible for beginners to design websites without coding. With drag-and-drop editors, templates and guided setup, even first-timers can learn how to design a website that looks professional. The key is following a clear process, content planning, site structure development, theme selection and pre-launch testing.
What's the best platform for beginners designing a website?
Wix and Squarespace are the easiest for most beginners — both offer drag-and-drop editors with hosting included. WordPress.com is another option for more flexibility without heavy setup. If scalability is important, WordPress.org works long-term but requires hosting and more setup.
Can ChatGPT design a website?
ChatGPT can't directly build websites, but it can help with planning, writing content, generating code snippets, and suggesting design ideas. Combined with a website builder or CMS, it speeds up brainstorming and drafting. Think of it as an assistant for strategy and content, not a substitute for design tools.
What are the 7 C's of a website?
The “7 C's” framework evaluates site quality: Context (layout and design), Content (text, images, video), Community (user interaction), Customization (personalization), Communication (contact and messaging), Connection (links, integrations) and Commerce (transaction features). Together, they help guide strategy and ensure websites deliver clarity, usability and business value.
Do I need coding skills to design a website?
No. Modern platforms like WordPress, Wix and Squarespace let you design visually without coding. Drag-and-drop tools, templates and plugins handle most tasks. Coding knowledge can help with advanced customization or troubleshooting, but it's not required for creating a professional, functional site that meets business or personal goals.
Can I design a website for free?
Yes. Free plans on Wix, Weebly and WordPress.com let you design basic sites without payment, though they include ads and subdomains. Open-source WordPress.org is also free, but you'll need paid hosting and a domain. Free tools are fine for personal projects; businesses often upgrade for control and professionalism.


 X
X