

Need to update your sitemap after adding new pages, a website redesign or for better search visibility? Start by checking whether your CMS already updates sitemap.xml automatically. In most cases, your job is to make sure the file reflects your current site, uses accurate URLs and can be read by Google.
This guide shows you how to update your sitemap, check it for common issues and resubmit it so search engines can find your latest pages.
Key takeaways
- Update your sitemap when important pages are added, removed, redirected or reorganized.
- Confirm CMS-generated sitemaps are accurate, even if your CMS updates XML sitemaps automatically.
- Clean up issues before resubmitting by removing dead URLs, fixing redirects and checking that indexable pages are not blocked.
- Use Google Search Console to confirm sitemap submission and parsing status, but remember that submitting a sitemap does not guarantee indexing.
Step-by-step guide to refreshing your sitemap manually
Updating your sitemap is simple: generate a new file in your CMS, plugin or sitemap generator, then resubmit it in Google Search Console.
Significant changes to your website’s layout, design or functionality warrant a sitemap refresh to accurately mirror the new site structure.
Most content management systems (CMSs) like WordPress, Shopify and Wix usually handle this automatically, but it’s always worth checking that your sitemap reflects your latest site structure before expecting Google to recrawl.
Regular updates also improve SEO by ensuring search engines recognize your newest and most important content.
Here’s how to update your XML sitemap file:
- Enter your website’s URL into a sitemap generator
- Download the new sitemap file, usually
sitemap.xml - Upload it via your host’s file manager or FTP
- Place the file in your website’s root directory (i.e.,
yourdomain.com/sitemap.xml). - Verify the update by visiting
[yourdomain.com]/sitemap.xml - Submit it to Google Search Console under Indexing → Sitemaps
Review your current sitemap for issues first
Before updating your sitemap, you should review the existing sitemap.
To do this, you first need to find your sitemap by checking common URLs like /sitemap.xml or other variations like /sitemap-index.xml, which are generally placed in the root directory of your website.
Once you’ve found it, you can use a sitemap validator tool to start a crawl of the sitemap URL to find any broken links or other issues within.
Updating isn’t just about adding URLs; it’s a chance to step back and evaluate your site. If major changes are needed, design a sitemap first to plan the structure before updating the XML file.
Making necessary adjustments
Having reviewed your sitemap, the next step involves making adjustments. Here are some actions you can take:
- Remove URLs of pages that no longer exist or aren’t intended to be indexed
- Update or remove broken links and redirects
- Fix 404 errors to maintain an error-free map
When adding new pages to your sitemap, include clean, canonical URLs and an accurate lastmod date if the page has changed in a meaningful way. For Google, priority and changefreq aren’t practical crawl or indexing levers, they’re more like hints, so a current, reliable sitemap matters more than filling out every optional sitemap field.
Finally, ensure the sitemap.xml file is placed in the root directory, follows proper sitemap protocol with the correct opening and closing tags, includes URL entries formatted correctly with required and optional tags, and properly handles any mixed content and encoding issues.
Automatically updating sitemap files with your CMS
Most modern platforms update sitemap files automatically when you publish, edit or remove content, but behavior varies by platform, plugin and site setup. After a redesign, migration, URL cleanup or indexing issue, check your sitemap settings and confirm Google can fetch the live file.
WordPress
WordPress can generate XML sitemaps natively, but many sites use plugins like Yoast SEO, Rank Math or XML Sitemap Generator for Google for more sitemap control.
- Check your generated sitemap URL, usually at
[yourdomain.com]/wp-sitemap.xml,/sitemap.xmlor/sitemap_index.xml. - If you use an SEO plugin, make sure XML sitemaps are enabled.
- Review the sitemap settings to confirm current content is included.
- Submit that URL in Google Search Console (GSC) or Bing Webmaster Tools once. From there, WordPress or your SEO plugin should handle future updates as you change content.
Shopify
- Shopify generates your sitemap automatically at
[yourstore.com]/sitemap.xml. - Add or remove products, collections, etc. and the sitemap updates instantly.
- Submit the sitemap URL in Google and/or Bing once; no further manual updates needed.
Wix
- Wix automatically creates and updates your sitemap at
[yourdomain.com]/sitemap.xml. - Content changes are reflected automatically.
- Submit the URL to Google and/or Bing for indexing.
Webflow
- Webflow automatically generates a sitemap when you publish on a paid plan.
- Access it at
[yourdomain.com]/sitemap.xml. - Submit the sitemap URL in Google and/or Bing once; future updates happen automatically.
Squarespace
- Squarespace auto-creates and updates your sitemap as you add or remove content.
- It’s located at
[yourdomain.com]/sitemap.xml. - Submit the URL in Google and/or Bing for indexing; no further action required.
Joomla!
- Install a sitemap extension like OSMap or JSitemap.
- The extension will generate and update your sitemap automatically.
- Submit the sitemap URL in Google and/or Bing for indexing.
Drupal
- Install and enable a module like Simple XML Sitemap.
- Configure it to generate and refresh your sitemap as content changes.
- Submit the URL in Google and/or Bing once; updates will be handled by the module.
🎬 Learn what Slickplan can do!
We filmed a short video to show you exactly how to use Slickplan
Understanding the importance of sitemap updates

There are many types of sitemaps out there, but the one that Google and others are looking for site updates in is the XML sitemap.
Sitemaps organize your website effectively, facilitating better navigation and SEO by clarifying page hierarchy and relevance to visitors and search engines alike.
They’re like a tour guide for search engines, helping them understand your site’s structure, prioritizing pages based on importance and staying updated on how often and when they change or new content is added.
Maintaining an updated sitemap is like shining a spotlight on your website, enhancing its visibility and discoverability. This proactive approach can lead to better indexing and improvements in your website’s SEO.
Additionally, organizing content in a sitemap improves website structure, leading to clearer pathways for users, helping them navigate your site more effectively.
When to update your sitemap?
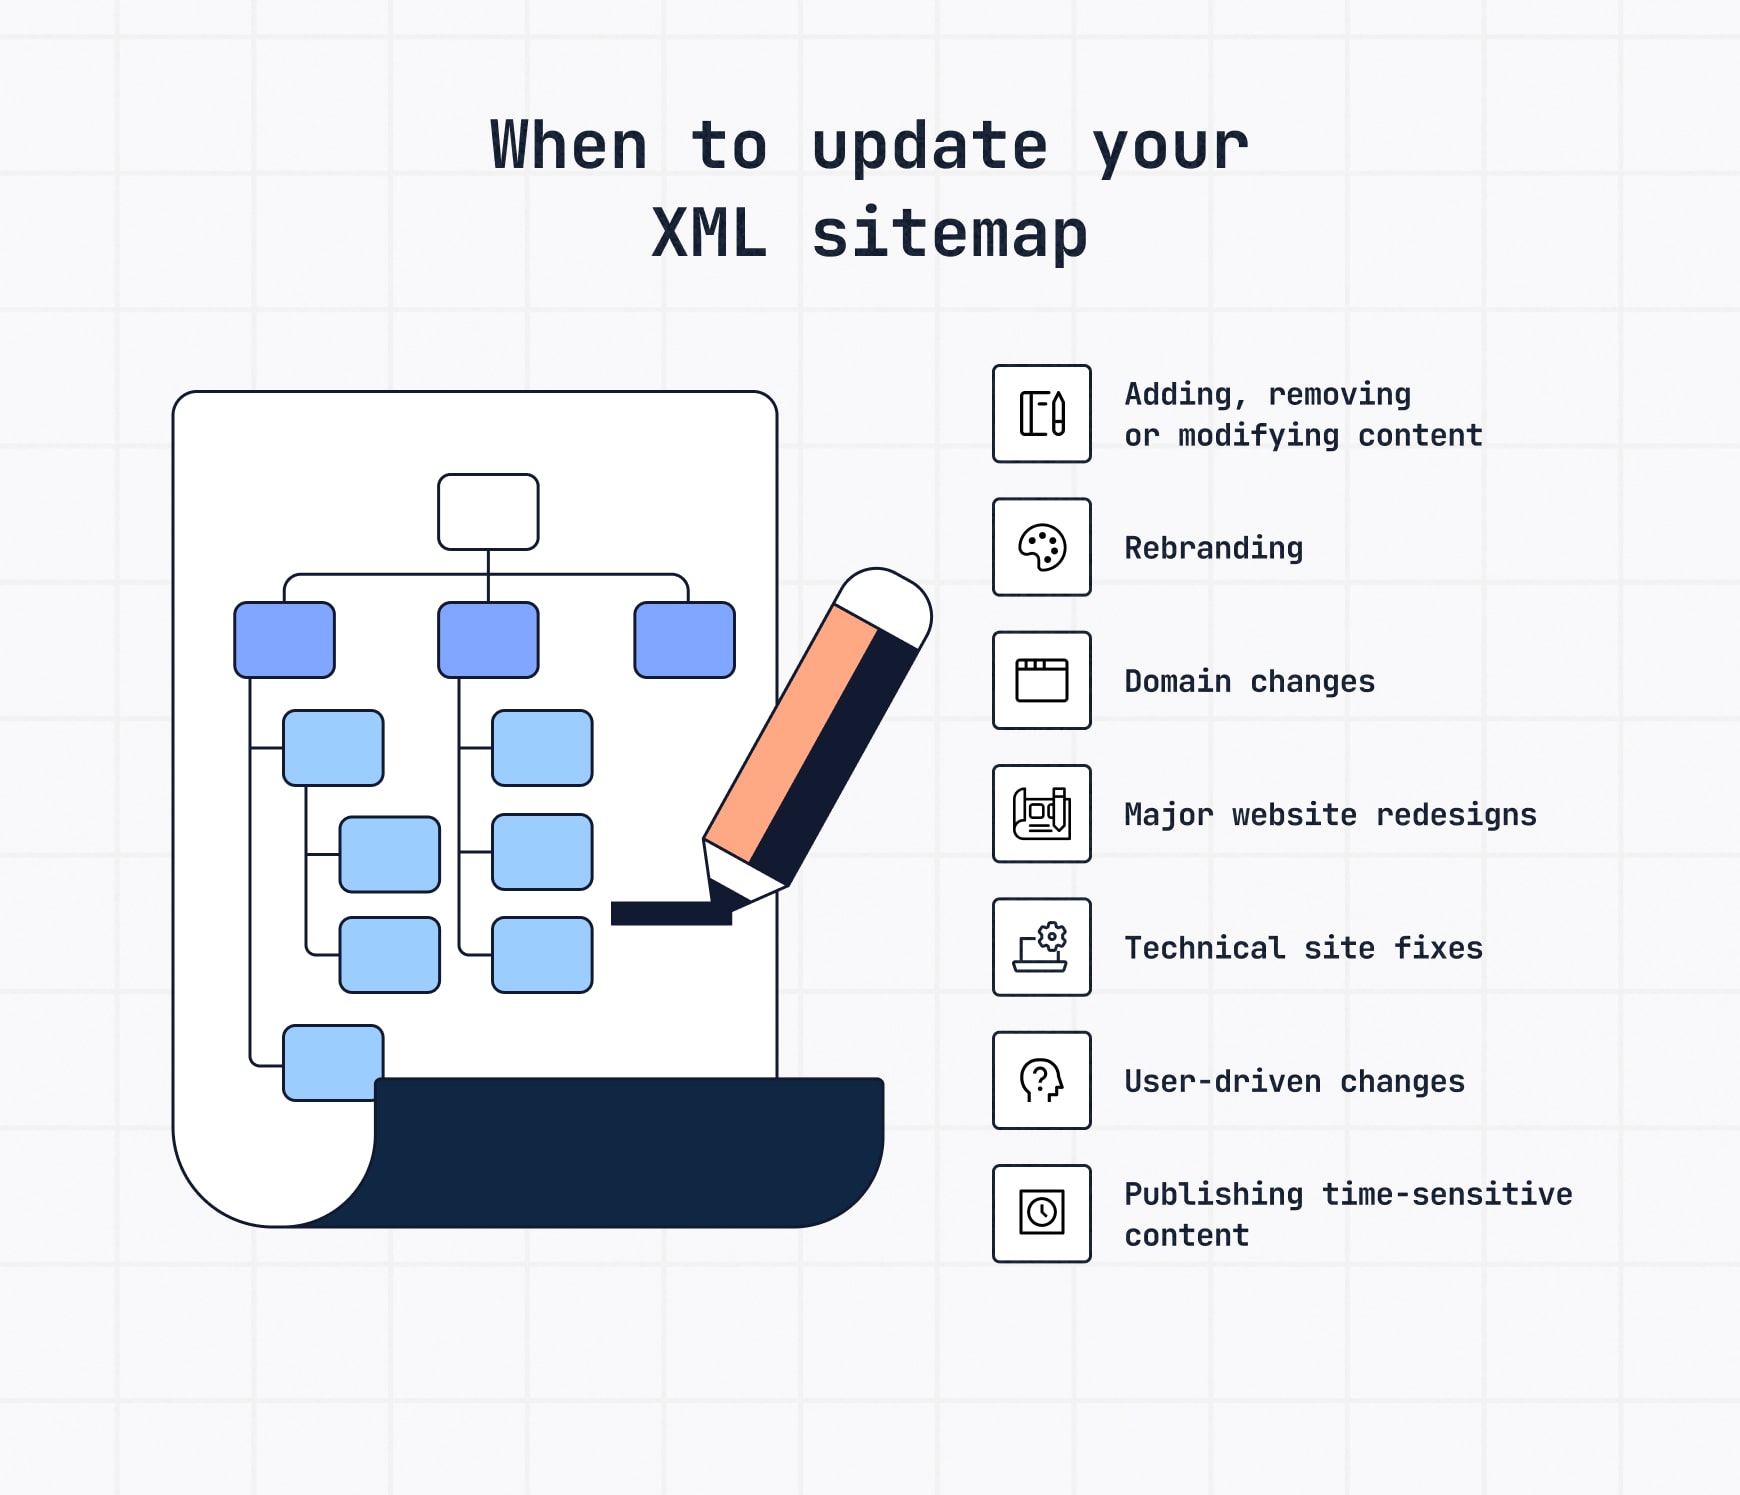
Think of your sitemap like a city map; it needs to keep pace with new “streets” and landmarks on your site. Update it whenever there’s a meaningful change, such as:
- Adding, removing or modifying content — new product pages, blog posts, retired sections or any other pages that get changed.
- Rebranding — refreshed structure, design, or messaging.
- Domain changes — migrations or URL restructures.
- Major redesigns — shifts in navigation or hierarchy; not a bad idea to use an AI sitemap generator to get started.
- Technical fixes — improved performance, server changes or internal linking updates.
- User-driven changes — insights from testing or feedback that alter the user journey.
- News or time-sensitive content — for sites publishing regularly, keep
lastmodaccurate so search engines catch updates quickly; Google News sitemaps should also update as stories are published.
The impact on search results
An updated sitemap is a compass guiding search engine crawlers to your most important web pages.
For Google, the most useful sitemap details are accurate URLs and reliable lastmod dates that reflect meaningful page changes. The changefreq and priority fields may still appear in older sitemap workflows, but Google doesn’t use them as practical crawl or indexing signals.
Accordingly, high-quality content should be emphasized to give your site the best shot at being indexed to your liking, potentially improving your search results in the process.
Using Google Search Console and Bing for sitemap submission
When your sitemap is done with updates, the next step is its submission. Google Search Console is your go-to platform for this process, given that it’s the world’s most used search engine.
GSC accepts various sitemap formats:
- XML
- RSS feed
- Atom 1.0
- Plain text
The URLs should be UTF-8 encoded and fully qualified.
The Sitemaps report is where you submit your sitemap and check whether Google could fetch and read the file. For indexing details on the URLs in that sitemap, use the Page indexing report.
Google attempts to crawl newly submitted sitemaps promptly while maintaining an independent crawl schedule for the site, details of which are available in the Sitemaps report.
The report also offers insights into the last crawl request status for every sitemap and detailed error information if applicable. For troubleshooting submission issues, Google Search Console will continue trying to fetch and process the sitemap for several days if errors persist.
Submitting your updated sitemap
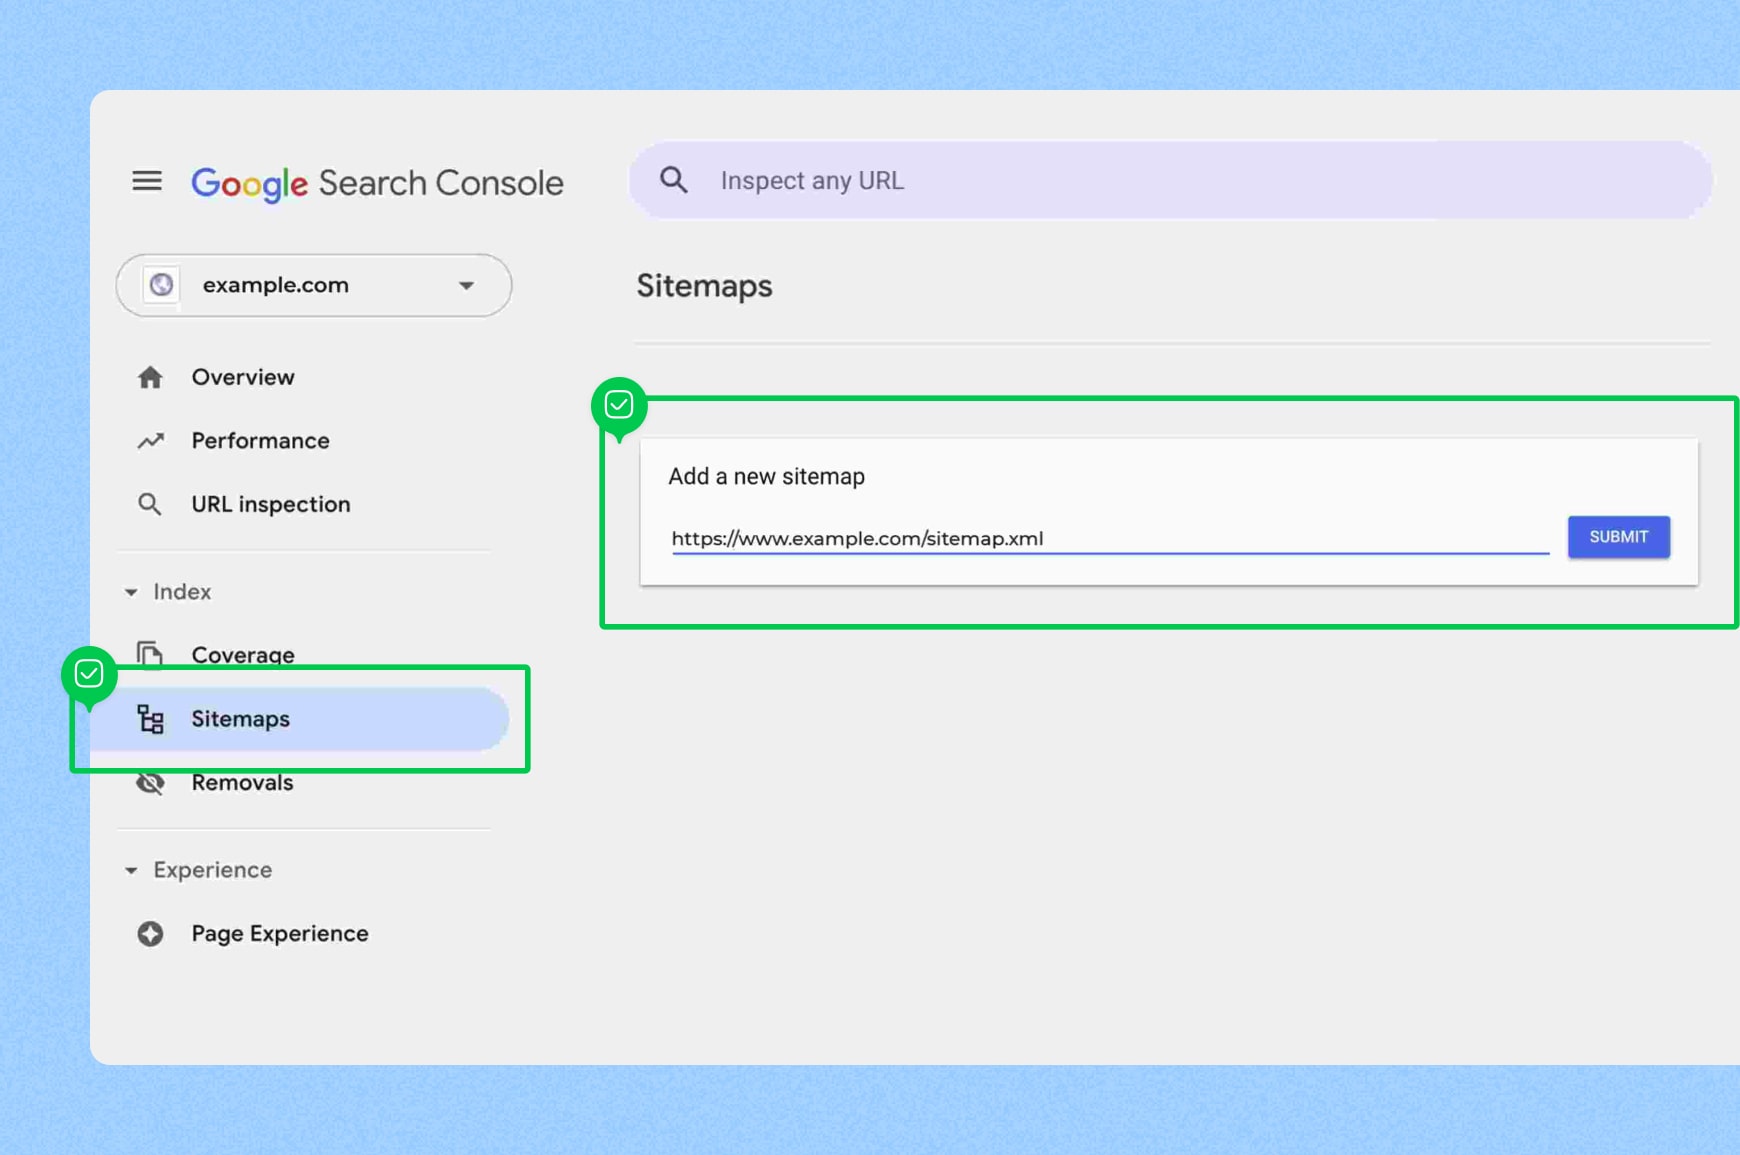
Submitting your updated sitemap to Google Search Console is a hassle-free process:
- Go to GSC and click the “Sitemaps” tab
- Add the complete URL of your sitemap file and click “Submit”
- Ensure that the sitemap URL you submit does not redirect
- Verify that the sitemap is submitted through the Sitemaps report or the Search Console Sitemaps API correctly
Note that you can submit up to 500 sitemap index files per site in a GSC account.
While submitting a sitemap index through the Search Console can expedite the indexing of web pages, it doesn’t ensure that all pages will be indexed.
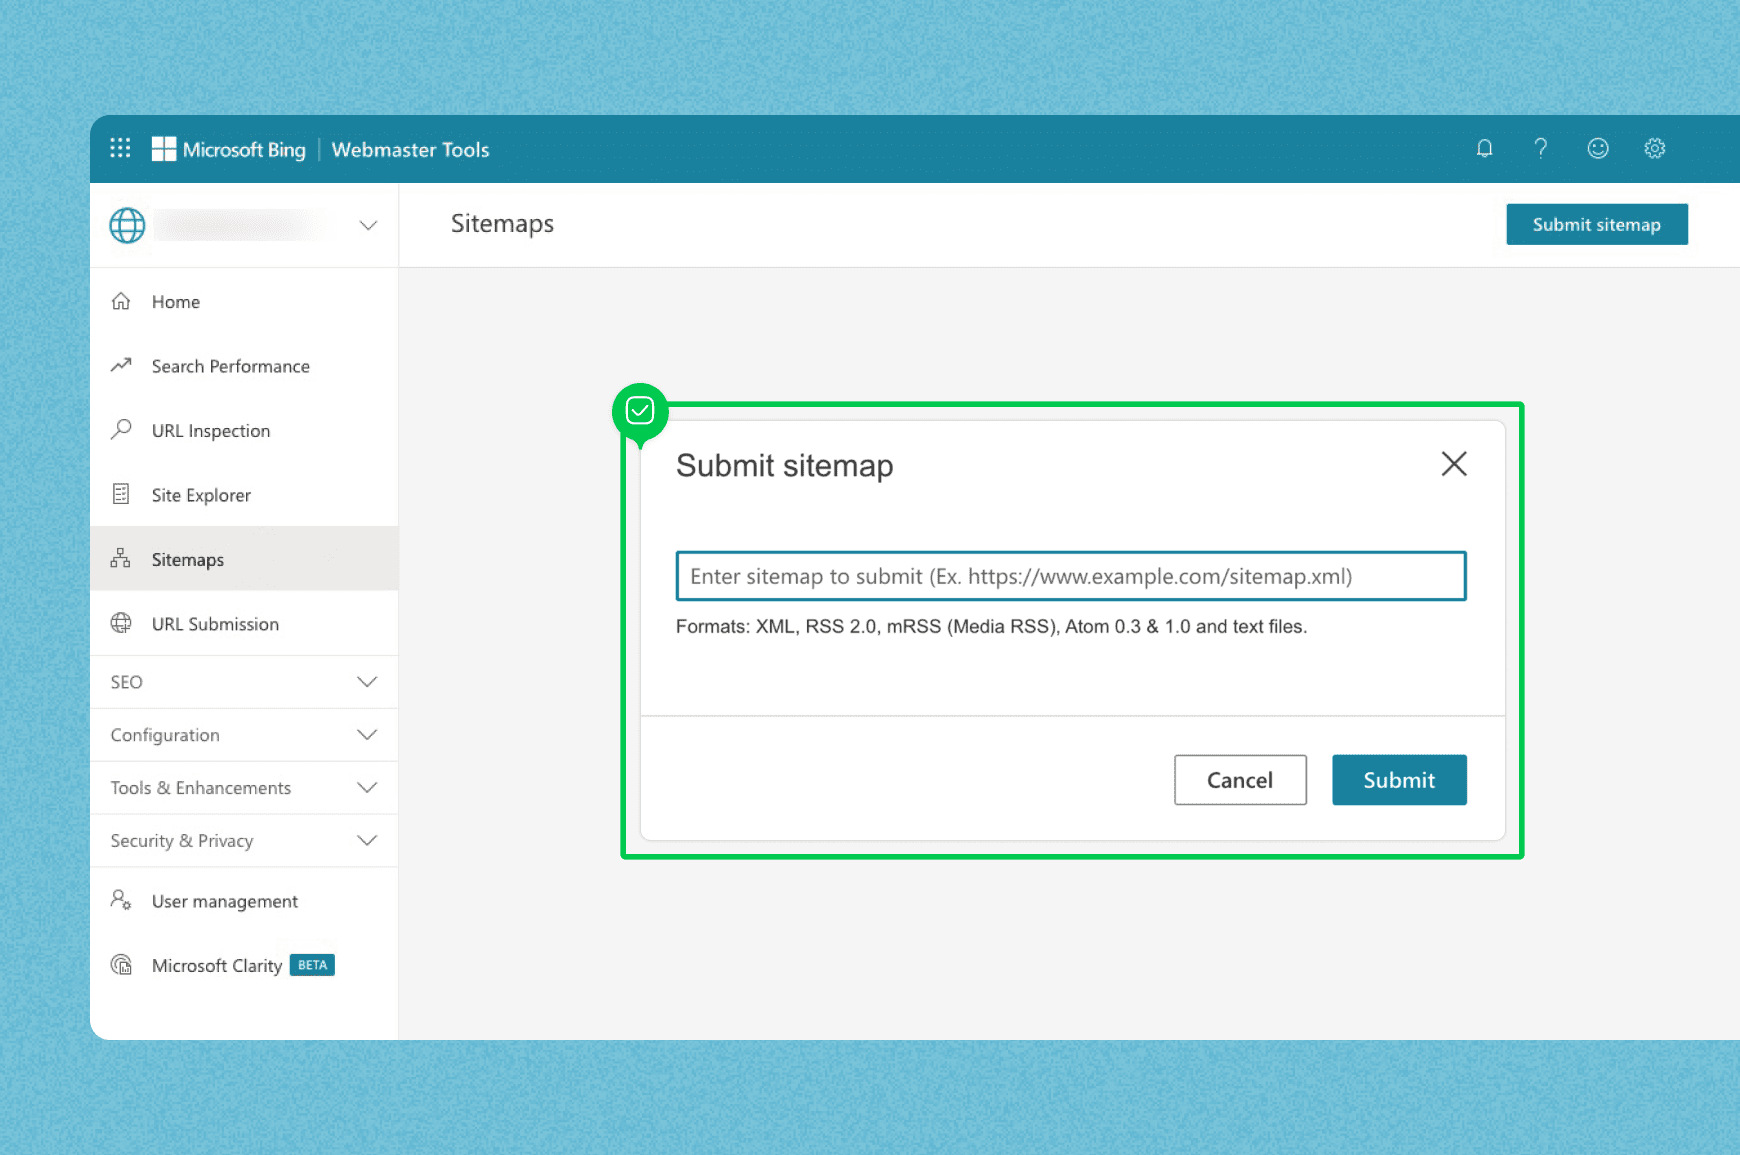
Submitting to Bing via Webmaster Tools is another smart move and the process is similar:
- Go to Bing Webmaster Tools and click the “Sitemaps” tab
- Click “Submit sitemap” in the top right
- Enter your sitemap URL and hit “Submit”
- Look for the “Success” status code
Monitoring sitemap status
Post-submission, monitoring your sitemap’s status is crucial to confirm successful crawling and indexing.
Check the Sitemaps report for fetch or parsing errors, then use the Page indexing report to review indexing issues like 404 errors, redirects, blocked URLs or pages Google has discovered but not indexed.
Back in the Sitemaps report you can find details on the URL submitted, sitemap type, last submission date, latest crawl status and number of discovered pages.
You can identify the status of your latest sitemap crawl in the report, which can be ‘Success,’ ‘Has errors’ or ‘Couldn’t fetch’ and consult the report for troubleshooting fetch errors.
After updating your sitemap, verify its presence by navigating to your domain’s sitemap.xml and resubmit if necessary.
You can also use the URL Inspection Tool in Google Search Console to verify individual page indexation status within your sitemap.
For detailed reporting on index coverage and identifying any errors, click on a sitemap in the GSC Sitemaps report.
Automation tools for sitemap updates
The task of updating a sitemap manually, particularly for a large website or if you run multiple websites, can seem overwhelming.
Automated tools come to the rescue here, simplifying the process by generating a sitemap automatically.
Popular automation tools for generating and updating XML sitemaps include:
- Yoast SEO plugin for WordPress
- Google XML Sitemaps plugin for WordPress
- Screaming Frog SEO Spider
- XML-Sitemaps.com
Using these can save you time and ensure that your sitemap is always up to date and maintained.
Once updated, these tools also facilitate the submission of XML sitemaps to search engines.
There’s another way to have your sitemap automatically update itself; it’s called a dynamic sitemap but it requires coding expertise. Worth the effort for a site that gets updated often or for ecommerce sites with hundreds of changing product pages.
XML sitemap generators
These are an easy way to get an XML sitemap quickly. Popular options include:
- Slickplan’s XML sitemap generator: our free service for generating XML sitemaps for websites
- XML-Sitemaps: provides a free XML sitemap generation for small websites up to 500 pages
Enter your site’s address and they’ll create a well-structured, submission-ready sitemap, improving your website’s visibility and search engine rankings.
CMS integration
As mentioned above, sitemap updates are often handled inside CMSs. Most do this natively, while others require plugins; either way, it simplifies sitemap management.
Slickplan has CMS plugins for:
- WordPress
- Drupal
- ExpressionEngine
- concrete5
- Joomla
Managing multiple sitemaps for large sites

What exactly does a large site mean in this context?
50,000 pages or a sitemap file larger than 50MB.
If that’s your site, pay attention, this part is for you, because you’ll need to break down your sitemap into multiple sitemaps.
But don’t fret, in the next few sections we’ll take you through segmenting your sitemap and creating a sitemap index file that allows you to submit many sitemaps at once.
Creating a sitemap index
A sitemap index file is a table of contents for multiple sitemap files.
What markup language is used for a sitemap index file?
It’s structured in XML format and begins with the <sitemapindex> root tag.
Each individual sitemap’s information is encapsulated using the <sitemap> tag. The URL location of each sitemap is specified within the <loc> tag in the sitemap index file.
As per Google, “you can submit up to 500 sitemap index files for each site in your Search Console account.”
Segmenting sitemaps
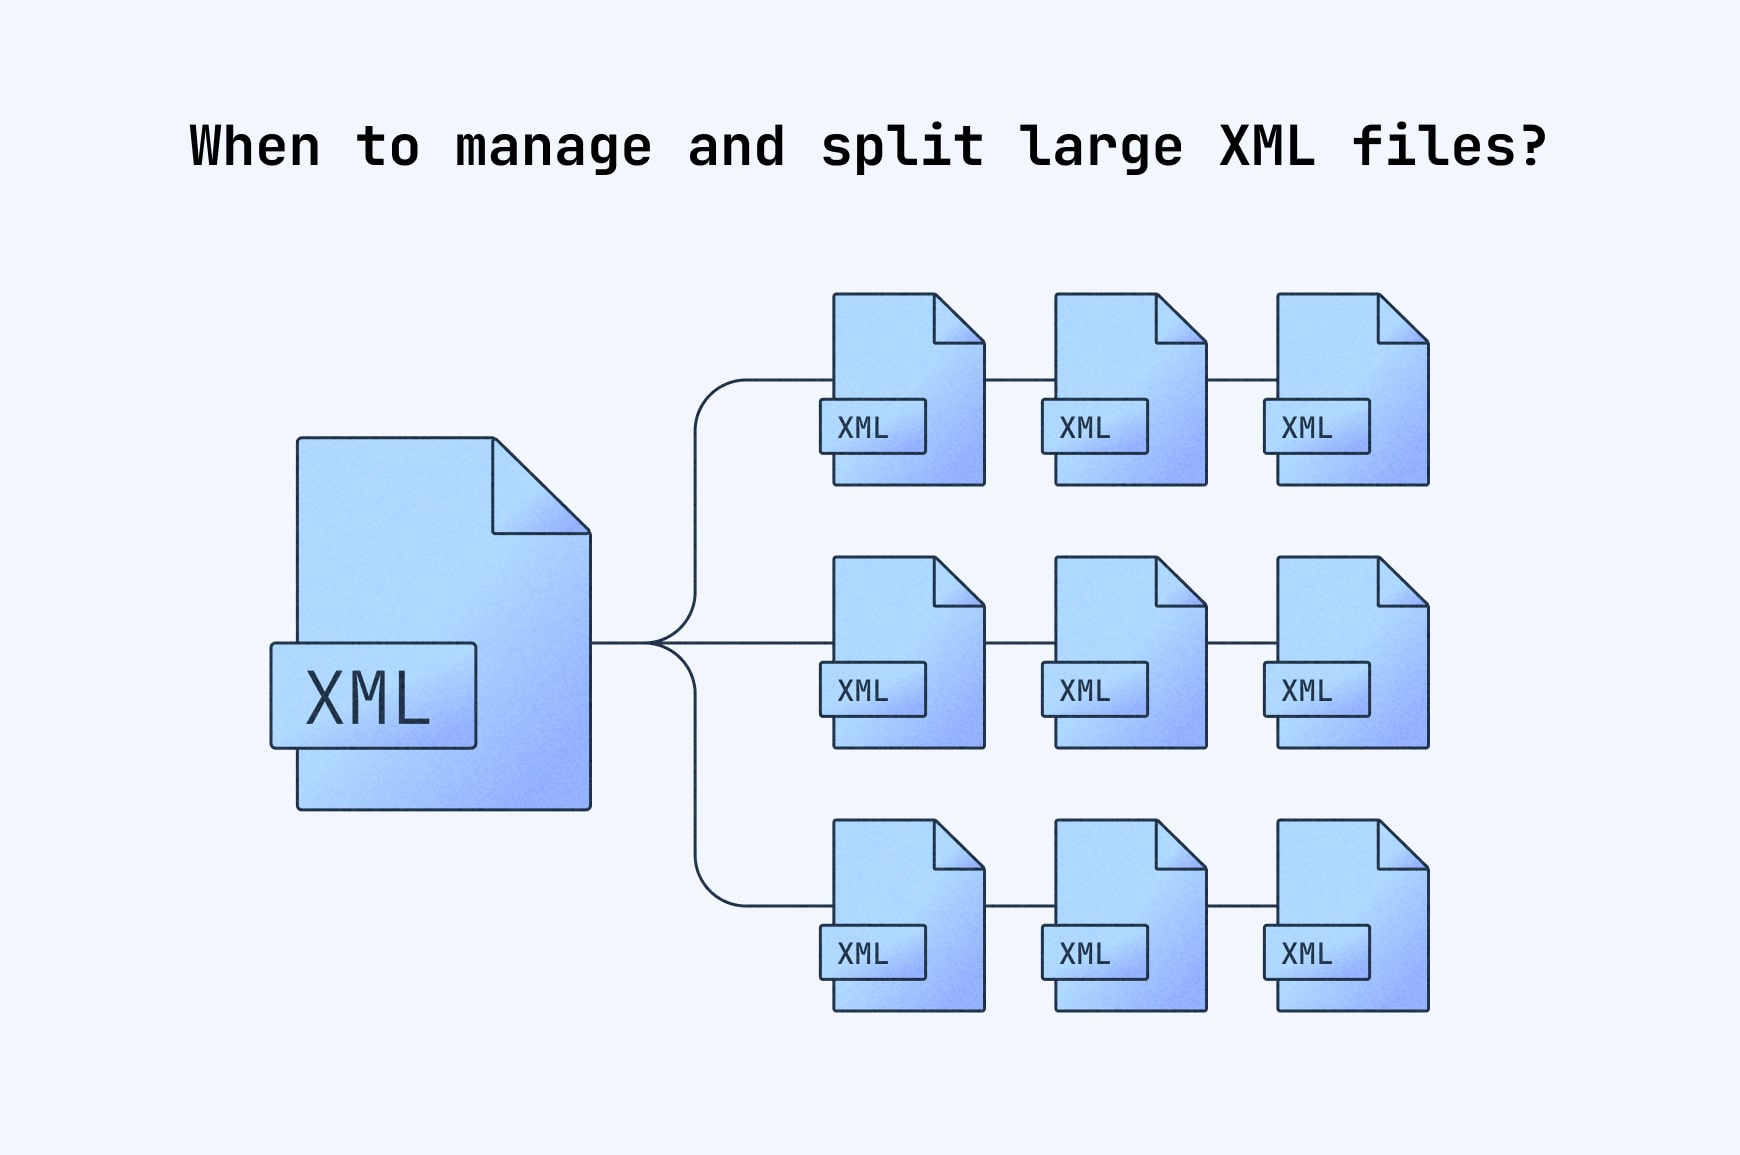
Segmenting sitemaps is like dividing a large city map into smaller districts. For large websites, separate sitemaps for blogs, products, categories or other sections can make the site easier to manage and troubleshoot.
Segmenting sitemaps can help identify specific areas of a site where indexing issues occur, allowing for quicker resolution and improved indexation.
For large sites, segmented sitemaps can make crawl or indexing issues easier to diagnose because you can review problems by section, content type or parent theme.
For websites with content that grows over time, such as news publications, segmenting sitemaps can also involve using date naming conventions to ensure efficiency in crawling and indexing.
Creating a hierarchical structure of sitemaps can improve the organization of content and enhance a website’s topic authority.
For large websites, it is recommended to set up sitemap indexes for each parent theme to manage sitemaps efficiently. Structuring sitemaps hierarchically allows for granular reporting and increased sample data for troubleshooting.
Establishing rules for sitemap naming conventions, organization, hierarchy, sitemap generation and limits on URLs and indexes is important when briefing development teams on sitemap creation.
Ensure sitemap accuracy with manual checks
Automated tools and CMS integration simplify updates, but the value of manual checks cannot be understated.
Periodic manual checks of a sitemap ensure that key pages are accurately represented, which benefits both site management and indirectly aids SEO by highlighting pages that require attention. In some cases, it may even be necessary to manually create a sitemap to ensure accuracy and proper representation.
This is naturally much easier for smaller sitemaps.
Identifying errors manually
Like being a detective, manual checks for errors involve looking for broken links, unintended redirects and URLs that are no longer relevant or have been intentionally removed from the website.
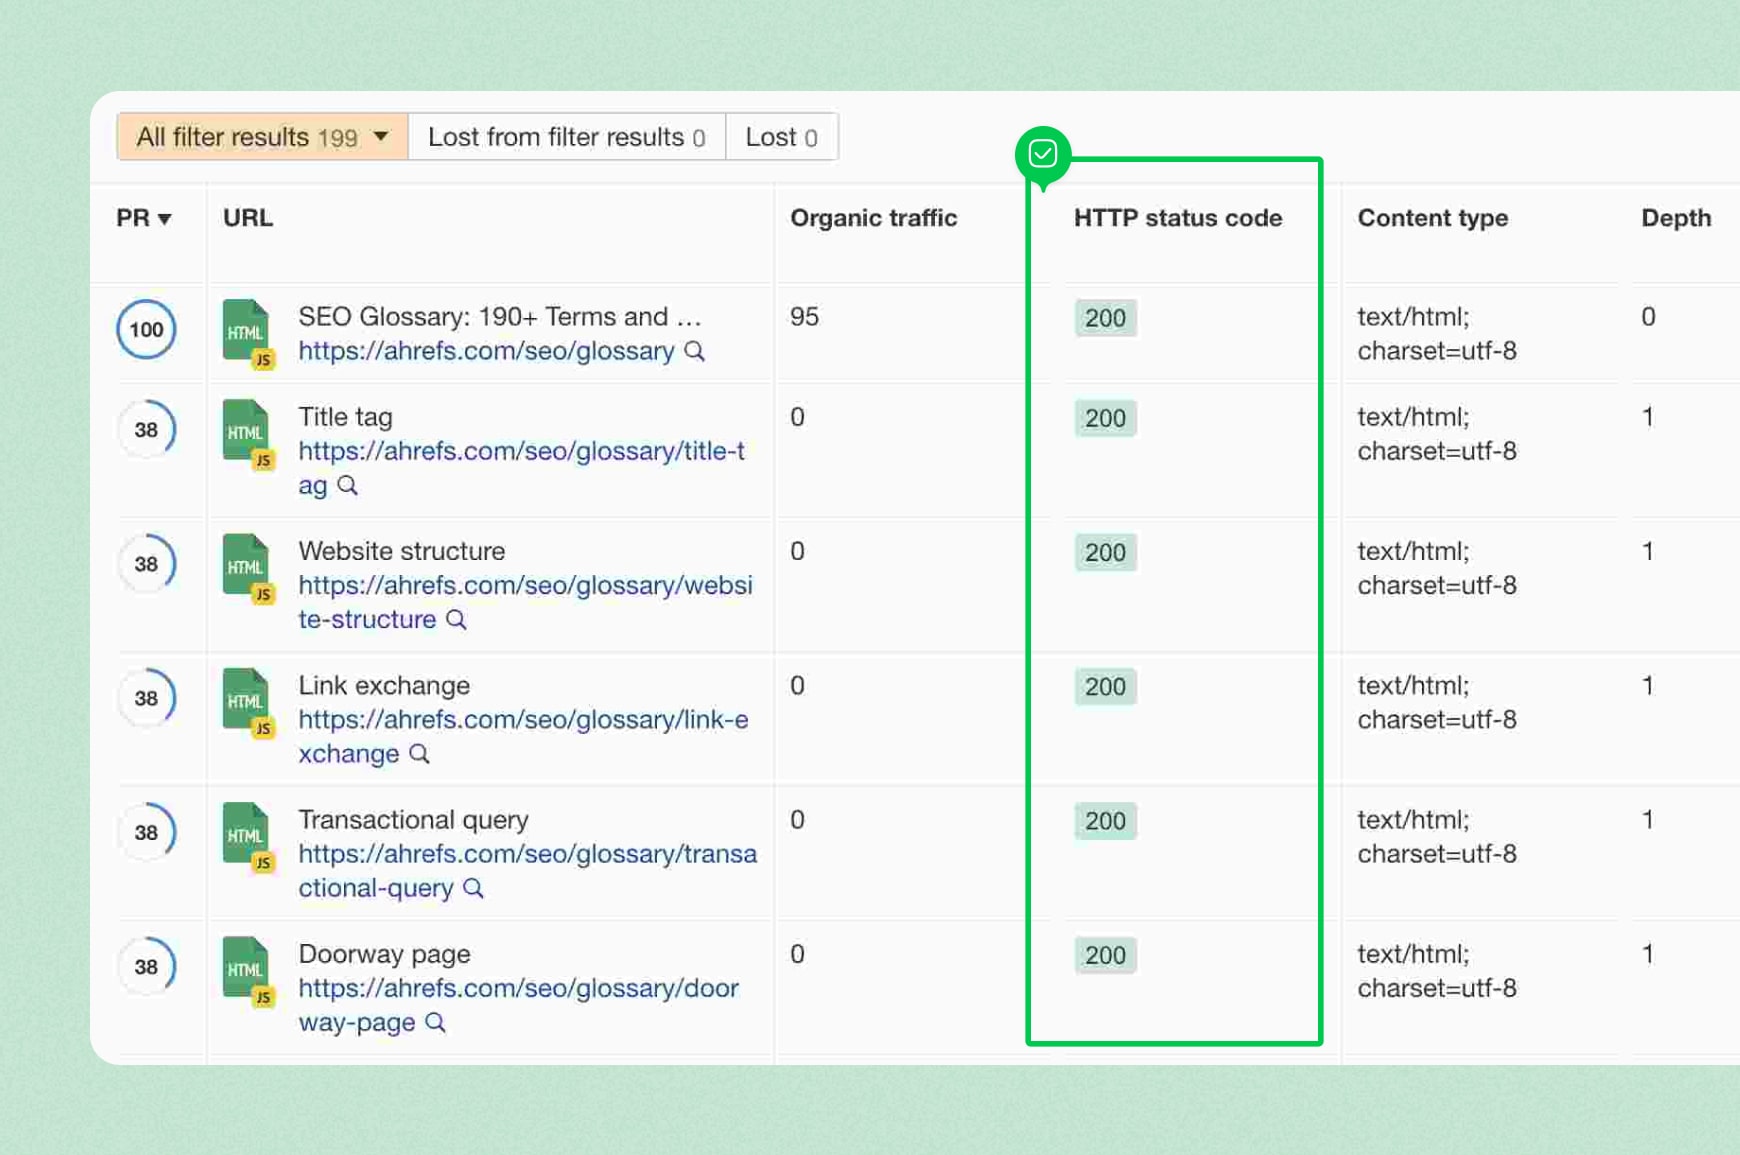
It’s crucial to verify that all URLs in the sitemap respond with a 200 status code, indicating that the pages are accessible without 404 or 500 errors and the like.
Ensure included pages are not blocked by robots.txt, do not contain a no-index meta robots tag, have a canonical version and meet the XML file format standards.
Check for uniformity and completeness in sitemap URLs, including the presence of HTTP/HTTPS protocols and ‘www’ if applicable.
Be judicious when selecting pages to include in the sitemap, ensuring high-quality pages are indexed and avoiding overloading search engine resources which might neglect important content.
Updating your sitemap manually
Updating your sitemap manually might be tedious, but it’s worth the effort to ensure all important pages are included. CMS content can have sitemap updates automated through external programs that hit the CMS API, utilizing a date field for the <lastmod> tag.
For static pages without an easy last modification date, automating sitemap updates can involve using the ‘last full published’ date or omitting the date altogether.
However, manual sitemap updates are necessary for new or updated website content like blog posts and product pages not automatically captured by CMS-generated sitemaps.
Best practices for sitemap maintenance
Sitemap maintenance isn’t a one-off task; rather, it’s a continuous process. Conducting regular reviews of a sitemap ensures that it remains an accurate representation of the website’s structure.
The priority attribute can assign a value from 0.0 to 1.0 to suggest the relative importance of a URL within your sitemap. For Google, though, priority values aren’t a reliable way to influence crawling or indexing, so it’s more important to include only canonical, indexable URLs that should appear in search results.
To optimize crawl budget allocation and prevent confusion for search engines, follow these steps when creating a sitemap:
- Include only URLs that you want search engines to index
- Exclude
noindexURLs from the sitemap file - Place the sitemap in the root directory of the website, typically at
/sitemap.xml, for easy access by search engines
By following these steps, you can ensure that your sitemap is effective in helping search engines understand and index your website.
Regular review schedules
When maintaining an effective sitemap, consistency is key.
Establish a regular review schedule for your sitemap to ensure that it remains updated with the most recent changes to your website’s content.
As a rule of thumb, regularly audit at least once a month, or more frequently if your website changes often, to maintain an accurate and effective sitemap.
Handling dynamic content
Sitemap maintenance poses a unique challenge when dealing with dynamic content. A sitemap model designed as a tree structure can streamline management of dynamic content across your site.
Sitemap trees can be rendered into site navigation menus, which also facilitate the creation of XML sitemaps.
Adherence to the standard sitemap protocol as outlined on sitemaps.org is crucial for the XML sitemap to be effectively crawled and indexed by search engines.
Make your sitemap work for you with regular updates
Your website needs a reliable map to guide search engines and users. A well-structured, updated and accurate sitemap serves that purpose.
Whether you’re updating manually, relying on automation, or integrating directly with your CMS, the key is consistency. Regular reviews and clean updates protect your SEO, increase website visibility and improve UX.
Keep those XML sitemaps updated and let them guide the way to your content.


Design user-friendly sites with Slickplan
Use our easy drag-and-drop interface to ensure people can get where they want to go.
Frequently asked questions
Are there tools to help keep a sitemap up to date?
Use a visual sitemap generator to transform your XML sitemap into a clear, interactive and editable visual sitemap displaying your website's structure and make updates accordingly before submitting. Think of it as an ongoing record of your site's current structure.
Do I need to manually update a sitemap?
You usually don't need to update a sitemap by hand if your CMS or SEO plugin generates it automatically. Manual updates are more common for static sitemap files, custom builds, migrations or major URL changes where you need to confirm every important page is included.
Does a sitemap update automatically?
It depends on how your sitemap is generated. Static sitemap files need to be updated manually, while most CMS-generated or plugin-generated XML sitemaps update automatically when you publish, edit or delete content.
How often should I update a sitemap?
You should update your sitemap whenever you make significant changes to your site, like adding or removing pages, to help search engines discover and index your content efficiently. This can support search visibility and user experience by keeping your sitemap aligned with your current site.
How do I keep my sitemap up to date?
If your CMS or SEO plugin manages your sitemap, you usually don't need to update it manually. Publish your content, confirm the sitemap is live at
/sitemap.xmlor the correct sitemap URL for your setup, and resubmit it in Google Search Console after major structural changes or fetch errors.Why is it important to keep my sitemap updated?
It's important to keep your sitemap updated because it helps search engines understand your website's current structure, discover new or changed pages and avoid outdated or broken URLs. A clean sitemap can support better crawling, indexing and overall site visibility.


 X
X